Restoring Vintage Cameras I: The Golden Rule (An eBay Buying Guide)

The Camera and the Goat

eBay Ad 2008

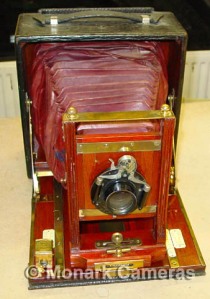
“Folding Ansco camera box with tripod. I call it a camera box because it does not have any optical parts inside. The box (without tripod) is made of wood and brass and glass. And the length depends on if it’s folded shut or opened all the way. There is glass in either end. The “box” folds and moves and tilts and swivels in more ways than one can imagine. It does everything but take a picture! If you have any questions please email me. Goat in photos not included.”

——————————————————-

The most important thing to remember about restoring vintage cameras is: Don’t.

Don’t put yourself in the position of doing a thing that you don’t have to. This means buying the very best camera that you can for the least amount of money and needing to do the least amount of restoration possible. Since much of vintage camera shopping is done on eBay, this means becoming painstaking about dissecting the language of eBay ads and examining in minute detail the often substandard photographs of old equipment. At least you might be able to save some money when they’re included in eBay promotions like (https://www.raise.com/coupons/ebay). There are other e-commerce options that you could explore too online but generally, eBay is the most popular. Though lot of online shopping websites have improved greatly in recent times, often after using the services offered by Salesforce.

So…First, the language. The most obvious red flags are phrases such as “For parts”, “For restoration”, “As is”, and “No refunds or exchanges.” These usually indicate an honest seller who has a camera that is in poor condition or has parts missing. This is not necessarily a bad thing if parts are what you want. Old 1920s Kodak Moroccan leather is almost impossible to match, and many otherwise nice Kodaks are missing the strip of leather just above the front plate. Having a trashed camera to strip for leather to patch missing pieces can be a definite asset. However, “No refunds” means just that, and if you are spending money with this proviso, be reasonably sure of what you are getting, or be prepared to accept the risk.

The other phrase one encounters is some variation on “I don’t know anything about cameras…” In this case, the onus really is on the buyer to determine the condition and desirability of the camera from the image and what is usually a sparse and inaccurate description. This situation can, however, at times work to the buyer’s advantage; if one knows what one is looking for, a poorly-described item often attracts fewer competitors in the bidding process, and real gems can sometimes be picked up for a modest price.

Second, the photographs. These need to be examined minutely. If, like most photographers, you have a Photoshop on your computer, you can often use the program to examine substandard images. Click “ENLARGE” under the image, then right click on the picture and use “Copy Image” or “Save Image As” to download a jpeg copy of the item’s image. Then open the image in Photoshop and use the “Curves” and “Brightness and Contrast” functions to lighten up dark areas and expose detail. The image can be expanded using Photoshop’s zoom function to examine manufacturer’s nameplates for model numbers, bellows for corner wear, and hidden corners for rust spots.

The defects that can be tolerated depend on one’s level of skill. Repairing shutters is complex and potentially expensive, so I prefer cameras whose description indicates that the shutter is firing correctly. Shutter speeds may still be slow in this case, but there should be no major problems. Although very experienced restorers will rebuild or replace bellows, my experience has taught me that at my skill level, bellows requiring significant repairs are a major undertaking and should be avoided. Scrutinizing the images for ratty corners or buckled or sagging folds will prevent hours of patching holes and reinforcing folds where the cardboard panels have collapsed. In general, I avoid cameras where the description or picture suggest any problems with the shutter or bellows.

Bellows and Their Problems:

It is worth considering bellows construction in more detail in order to understand the anatomy of bellows problems. The best quality bellows on older cameras were constructed from a thin leather skin with a fine linen cloth layer inside, between which were thin strips of firm cardboard which encouraged the leather to fold along the creases between the strips. The earlier bellows had square cut corners, but this was found to promote pinholing at the corners, so a shift to chamfered corners began around 1900. In practice, most vintage cameras that one deals with have chamfered folds.

Square Cornered Bellows 1889 Lancaster Instantograph

Chamfered Corners 1904 Sanderson

Leather bellows can show remarkable longevity, and even after a century can still be soft and light proof with well-defined folds. However, if poorly stored or treated, they will simply fall to pieces, or if allowed to get wet will become stiff and fragile. If improperly folded or crushed so that the cardboard reinforcing struts are crumpled, bellows of any kind will become floppy and impossible to fold, as shown by this Rochester Century Camera:

Rochester Century Cirkut with Crumpled Bellows Stays

These bellows need to be replaced or disassembled and rebuilt. The camera is probably worth the investment, but either approach is expensive and time-consuming.

Later bellows, particularly on less expensive cameras, were made of a light canvas-like fabric treated to make it lightproof. This material can be less durable and can develop pinholing at the corners, allowing light to leak in. This problem is not uncommon and is virtually impossible to detect from eBay photographs. However, it can in many cases be easily remedied if only a few corners are affected; this problem will be covered in subsequent posting on restoration. Fabric bellows are also susceptible to crumpling of the cardboard struts if badly treated or subjected to moisture; such bellows are past being salvageable, as can be seen with this brown No. 1 Kodak:

Crumpled Bellows Stays on a Roll Film Camera

Returning Items:

Do not be shy about returning items that are not as described. Sellers who send you items that are in poor conditition compared to the descriptions fall into two classes: those who are genuinely trying to pawn of a ratty camera, and those who are well intentioned and simply do not know better. Personally, I return unsatisfactory items as soon as possible, even sending them back from the post office within hours of receiving them, and without asking permission. The true grifter will usually complain, but can do little when faced with a fait accompli. The second class of seller usually knows nothing of vintage cameras, and simply does not realize that the nicks and gouges that lend character to an Edwardian sideboard are less appealing when encountered on a classic Voigtlander. These sellers are usually most apologetic and tend to be very grateful for the feedback. If a seller cheerfully issues a refund, I always give them glowing eBay feedback to that effect, and will often offer to advise them for free in the future on camera values or condition. Good eBay sellers are valuable, but those who cover problems without question are a godsend!

Other Problems to Watch For:

Rust can be difficult to detect, but may show up as a darkish discoloration. If you suspect rust, query the seller using eBay’s “Ask the seller a question…” function. Missing leather is a frequent problem, and matching old leather cam be extremely difficult. Camera straps are often missing or damaged, and photographs should be examined carefully to determine the condition of the strap. The image below of a No. 1 Kodak Junior shows empty top brackets and an absent top strap:

Missing Strap, No. 1 Kodak Junior

Missing leather can be either obvious or subtle. Frequently, small bits of missing leather can be compensated for by painting the underlying metal the same shade as the leather covering. Alternatively, having a nonrestorable camera as a source of leather bits is helpful.

On classic Kodak cameras, one site to examine carefully is the region on the front of the body just above the drop-down front panel/baseplate. This is covered by a single small piece of horizontal leather. While the larger pieces covering the remainder of the body my become partially detached but usually retain some areas where the glue still holds, this small piece not infrequently falls off entirely when the glue begins to dry out, as illustrated by the Kodak below:

Leather Missing Above Baseplate

And Finally…

Even with carefully examination, there will still be some cameras that you pay good money for and just toss in the trash. I recently purchased for $35.00 a 120 Certonet, a make with which I have limited familiarity, and found it to have multiple small problems and, despite my examination of the pictures, a missing strap. Furthermore, it is simply a rather cheaply-made camera. I consider it a learning experience and will not buy another one. The same trip to the post office brought me a 3A Ansco roll film camera for which I paid the princely sum of $6.50. Despite having detached leather and needing a great deal of cleaning, this old gem is well made and entirely intact. It will restore beautifully. In the end, it all evens out, and the occasional piece of junk is balanced by the gems that you occasionally find for next to nothing.

References:

Living Image Vintage Camera Museum. “Camera Anatomy- Bellows Cameras.” http://licm.org.uk/livingImage/BellowsCamera.html

Selecting A Vintage Camera IV: The Baby Pacemaker Crown Graphic

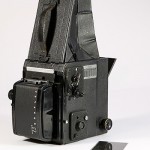
Pacemaker Crown Graphic with Kalart Rangefinder

For those who want to take a step up in technical capability, gaining ground glass focusing, basic camera movements, depth of field correction, interchangeable lenses, interchangeable film backs, and the ability to use short focus, wide angle lenses, yet still retaining the convenience of 120 roll film, stepping up to a minature (2 x 3 in format) “Technical” camera is the logical next step.  However, most of these, such as the Linhof, are quite expensive.  However, if one wishes to combine a reasonable price tag with most of these functions, the 2×3 Baby Pacemaker Crown Graphic is an amazing little camera.  Manufactured between 1947 and 1958, this small Pacemaker Crown Graphic is essentially a miniature large format camera boasting, with the exception of somewhat limited movements,  most the of the features  of a Linhof-type technical camera.

The Pacemaker Crown Graphic is a member of the class of cameras known as press cameras, the name deriving from the fact that these cameras were originally designed for use by press photographers.  Consequently, they were tough, well designed, enormously versatile, and capable of exacting results under the most difficult circumstances.  Although they were produced by many manufacturers, including Burke and James, Pressman, Linhof, Omega and Meridian, the term “Press Camera” will always elicit images of the ubiquitous Graflex cameras, especially the famous Speed Graphic and Crown Graphic.  Although originally aimed at journalists, the Graphic cameras became the workhorses for both art photography and general purpose commercial photography such as weddings, portraiture, product photography, documentary photography, and advertising.

The Graflex at War

The Speed Graphic was the still camera of World War II, and took many of the most famous images of that conflict.  On the home front, the most famous press photographer of them all, Arthur Fellig, a.k.a. Weegee, prowled the streets of New York with his Speed Graphic.

Weegee

After his first job selling candy, Arthur Fellig worked in a photo studio, a darkroom, and a photo agency before becoming a freelance news photographer in1935.  Specializing in the night shift between 10 pm and 5 am, he quickly became known for his gritty images of murder victims, fires,

Weegee at his Typewriter in the Trunk of his Chevrolet

and tenement life.  Installing a shortwave radio capable of receiving all police and fire transmissions in his 1938 Chevrolet, his reputation spread quickly for always being the first to arrive at a murder scene or fire.  Weegee’s nickname was a phonetic rendering of Ouija, due to his frequent, seemingly prescient arrivals at scenes only minutes after crimes, fires or other emergencies were reported to authorities. It is unclear whether he named himself Weegee or was named by the girls at Acme Newspictures. Weegee became one of new York’s best known and most flamboyant news photographers.  He went on to become involved in motion pictures and published several books, including the autobiographical Naked City, which inspired the movie of the same name.

The Confusing History of the Graflex/Graphic Name:

The folks who made the Graphic were as bad at naming their products as they were skilled at building cameras.  Consequently, it is worth noting the evolution of the Graflex company, particularly as it pertains to the nomenclature of the cameras and camera backs.

Original Graflex Reflex Camera

In 1887 William F. Folmer and William E. Schwing entered into partnership to establish a bicycle company, the Folmer and Schwing Manufacturing Company,  in New York City.  The company branched into camera manufacture, and in 1898, Folmer built the first of the famous 4×5 Graflex reflex cameras.  Since it was a single lens reflex, the original Graflex camera had no need for a ground glass focusing screen.  Film holders, film pack adapter backs, cut film magazines and roll film backs slipped into a channel on the bottom, and a sliding bar locked them in place from the top. These film holders and roll film backs are referred to as “Graflex” holders, and “Graflex” roll film backs, named after the camera they fit.  Many of Omogen Cunningham’s famous photographs were taken with her beloved reflex Graflex.

The firm was purchased by George Eastman in 1905, and in 1907, became the Folmer and Schwing Division of Eastman Kodak.   In 1926, as a result of a court order, this division of Eastman Kodak Company was offered for sale, but no buyers appeared. Consequently, the Folmer Graflex Corporation was organized in 1927 to take over the assets of the Division.  After a few more changes of status and name, the company finally became Graflex Inc. in 1945.  In 1956, it was purchased by General Precision Equipment, and in 1963, it was sold to the Singer Corporation.  Production ceased in 1973.

The company’s most famous product after the Graflex, the Speed Graphic, was a non-reflex press camera which  required a ground glass focusing screen.  The earlier models, produced 1912-1946, had a modification of the Graflex back with an integral, non-removable glass focusing screen.  This was designated as the Graphic (note the “ph”) back, or “Spring Back.”  In the Graphic back, the focusing screen was mounted in a frame on two pieces of spring steel which allowed it to be lifted away from the focal plane; the sheet or roll film holder would be placed under the frame, and the springs would hold it tight against the camera back.  This arrangement caused problems with roll film holders, with the early holders having to be partially disassembled and reassembled once they were in place on the camera.  Film holders for the Graflex and Graphic backs are not compatible.

Graphic Back with a Film Holder in Place

The next advance (and the introduction of one more name) was the introduction of the cast magnesium Graflok back, introduced in 1949. This is molded as part of the body, except for the “Super Graphic” and “Super Speed Graphic” models, which had rotating Graflok backs.  These backs accept accessories designed for either the Graphic or the Graflok back.

The Graflok back has two retention systems. Each system is a quick-release type. One system retains the focusing screen and hood assembly and the other system retains accessories such as roll film backs.

  1. The focusing screen and hood assembly has a pair of spring-loaded arms that engage a matching pair of hooks cast into the Graflok back. The arms are disengaged by pushing in on them; the focusing screen and hood assembly can then be slid slightly to the right to remove it from the back.
  2. A pair of sliding metal plates cross the back, one above and one below  the opening. These plates engage matching slots on the removable roll film backs.

Cut film holders are retained under the Graflok focusing screen and hood assembly in the same manner as with the Graphic backs. Cut film holders are interchangeable between Graphic and Graflok backs.  The Graflok system has been adopted by other manufacturers.

The Graflok Back

This hopefully will clarify the Graflex with an “f”/Graphic with a “ph”/Graflok situation.  This is an extremely confusing nomenclature, and photographic chat rooms frequently display messages from unfortunate individuals who have purchased a Graphic camera with an early Graphic back, only to discover that accessories for the back are difficult to find.  This is very perplexing, and causes newcomers endless frustration.  The degree of inconsistency engendered by this fine company’s permutations of nomenclature can be best appreciated when one considers that Graflex Inc, which did not exist until 1945,  never made the Graflex camera.  Furthermore, roll film holders for the later Speed and Crown Graphic (the majority of what is available on eBay) are prominently labeled as “Graphic” film holders, but, although they will fit a Graphic camera with a Graflok back, will not fit a classical “Graphic” back.

Manuals:

Copies of the manufacturer’s original manuals are available on Mike Butkus’ wonderful manual library at Orphancameras.com at http://www.butkus.org/chinon/.  The specific addresses for the Graphic manuals are noted in the references below.

Speed vs. Crown Graphics:

As noted, the model designation of Graflex cameras can be confusing, and the amount of literature on these ever-popular cameras, many of which are still in use today, is daunting and beyond the scope of this essay.  Suffice it to say that the Graphic press cameras of the mid-twentieth century can be divided into two main classes:  The Speed Graphics, which are equipped with a focal plane shutter in addition to the leaf shutter on the lens, and the Crown Graphics, which lack the focal plane shutter but are capable of working with lenses of very short focal length.

The Speed Graphics’  focal plane shutter is located within the camera body in front of the film plane.  This allows use of  lenses that do not have attached shutters (known as “barrel” lenses); however, this feature is of limited use.  In fact, for landscape and many other types of photography, the focal plane shutter is a decided hindrance, because it places an extra object between the film plane and the lens, precluding the possibility of using very short focal length lenses.  The Crown Graphic is unique in that the focusing track is hinged and extends into the case, allowing the front standard to approach very close to the film plane, and permitting the use of very wide angle, short focal length lenses.

General Features of the 2×3 Pacemaker Crown Graphic:

The Baby Pacemaker Crown Graphic has a sturdy mahogany body covered with black pebble-grained leather.  It is equipped with a Grafloc back that accepts a flip-up viewing hood, Graflex roll film holders, standard 2 x 3 in sheet film holders, and Graflex film magazines.  Like most press and technical-type cameras, the front cover folds down to form the front bed, revealing the double-extension focusing system controlled by two focusing knobs at the front of the bed (the 2×3 Graphic lacks the focusing lock noted in the image).

The Pacemaker Crown Graphic, Front View

The Graflex cameras have three ways to compose the image:  through a tubular viewfinder, apparent in the initial image at the beginning of this posting, via a pull-up press-type viewing frame incorporated into the front standard, and on the ground glass.  The tubular viewfinder is quick, but relatively small, and has adjustments for parallax.  It was originally provided with interchangeable masks for telephoto lenses, but these have such a narrow field of view that they are universally agreed to be unhelpful.  My viewfinder is masked for my 101 mm Ektar, and for other lenses, I use the ground glass.  The wire front frame finder is cleverly designed, pulling upward from the top of the front standard, and having click stops once it is extended to compensate for parallax.  It covers a field which, once again, is set for an approximately 100 mm., or “normal” lens.  For exact composition and focusing, the ground glass focusing screen is still the best option.

Movements:

The Pacemaker Crown Graphic has limited front movements, and no back movements. However, for landscape photography where the most critical adjustment is a modest amount of forward tilt to maximize depth of field, this repertoire is sufficient in horizontal orientation.  It should be noted that movements on the Graphics are accomplished in a somewhat unusual manner, but become second nature with a little practice.  There is one significant limitation however: the absence of front swing.  This is not a great problem in horizontal orientation, but does become a significant deficiency if one wishes to use the camera in the vertical orientation.  Since the back does not rotate, forward tilt when the camera is on its side for a vertical image would require a front swing, and this is not possible.  There are some mentions of modifications to the front standard to permit swing to be added, but the references are not readily available.

Front Shift:

To shift the front standard laterally, release the locking lever used to pull the front lensboard from inside the camera body. Press down on the small tab just below the lever, then slide the standard to the left or the right. Try not to move the front standard backward or forward after it is unlocked.  The amount of front shift is more limited when using short focal length lenses because the bed supports interfere with the full range of shift movements. With longer focal length lenses and more extension, there is no interference, and more shift is available.

Front Tilt:

The Pacemaker Graphics have no forward tilt, but possess a moderate degree of backward tilt. Forward tilt is accomplished by combining the drop bed with a moderate amount of front rise and varying degrees of backward tilt. After the bed is dropped, the formerly vertical front standard will point downward. In effect, this is a severe front tilt combined with a front fall. To correct this situation, apply front rise to bring the lens level with the film.  The amount of forward tilt is then determined by the degree of backward tilt.  With the full amount of back tilt, front tilt is zero, and the lens is parallel to the film plane.  With lesser amounts of backward tilt, the front standard and lens are effectively tilted forward.  This sounds unbelievably awkward, but is actually quite easy to do.  Setting up this movement is helped by the fact that the bed drop, rise and tilt are set up to coordinate nicely with each other, with a click stop on the bed.

Front Rise:

This is the easiest of the movements to use, and is accomplished by loosening the two knobs on either side of the front standard, raising the standard, and retightening the knobs.

Front Fall:

Similarly, it is possible to apply front fall by dropping the bed, applying full backward tilt to align the front standard with the back (thereby applying the maximum amount of front fall), and using the front rise to attain the desired amount of front “fall.”

Front Swing:

There is no front swing.  This is one movement that would be nice to have, as it restricts movements in vertical orientation.

Back Movements:

The Crown Graphics have no back movements. However, David Karp suggests the following method of achieving a back tilt:  “…it is possible to achieve a sort of back tilt by combining some of the front movements with an adjustment of your tripod head. First, tilt your tripod head back slightly. The degree that you tilt the head back will be based on your experience, because you won’t be able to see the effect of your movements for a little while. Next, drop the bed. Then, apply any necessary front rise. Finally, tilt the front standard backward until it is where you want it. Once you have completed all of these movements, you will be able to see the results of your “back tilt” and can make any fine adjustments.”

Lenses:

A variety of lenses are available for the Baby Graphic.  The one restriction is that the lens boards are small, limiting the selection of lenses to those having less than an approximately 50mm diameter rear element.

The two most common “normal” lenses usually found on the Baby Graphic are the 101 mm. Graflex Optar, manufactured by Wollensak, and the 101 mm Kodak Ektar, both four-element Tessar-type lenses.  The Ektar is an excellent lens (one of the best of the mid-twentieth century) and is capable of producing superb images.  The Optars are also solid lenses, but have a reputation for being somewhat less sharp.  Some Baby Graphics are found with Graflar or Trioptar triplets.  These are of lower quality and should be avoided.  Less commonly, high-quality optics by Rodenstock, Zeiss or Schneider, such as the 100mm Zeiss f/3.5 Tessar or the 80mm Schneider Xenotar can be found.  Another excellent lens that can occasionally be encountered is the 105mm f:3.7 Ektar, which has been described as having “…sharpness and bokah like a Summicron…”  Among modern lenses, the multicoated 100mm Schneider Symmar has been described as an excellent choice, providing top-notch optics with good coverage.

The most common telephoto lens found on this camera is the f/5.6 Graflex Tele-Optar, also by Wollensak, a good quality four-element lens similar to a Schneider Tele-Xenar. However, as far as the best image quality is concerned,  two better options  would be the five-element 180mm f/4.5 Rodenstock Rotelar or the 180mm f/5.6 Schneider Tele-Arton.

There are two common options for a medium wide angle lens, both in 65 mm. focal length; this is  roughly equivalent to  a 35 mm. lens on a 35 mm. camera.  The most common wide angle in this focal length is the 65mm f/6.8 Graflex Optar.  Higher image quality can be obtained from the 65mm f/6.8 Schneider Angulon, an excellent moderate wide angle lens.

One of the best features of the Baby Graphic is its ability to use very wide angles lenses, which can be difficult with some large format cameras.  The hinged focusing track allows the 2×3 Crown and Century (but not the Speed

Crown Graphic With Extreme Wide Angle Lens and Front Bed Dropped

Graphic) to rack and pinion focus these lenses right into the body.  The premier lens for this purpose is the Schneider 47mm f/8 Super Angulon.  47mm focal length on 6×9 cm. is equivalent to a 21-23 mm. lens on a 35mm camera.  This lens, in addition to its wide format, will cover the 6×9 cm.negative with room to spare.  Movements are limited due to bellows compression, but the ability to use this focal length outclasses some cameras with much larger price tags.  It should be noted that, while 65 mm. moderate wide angle lenses can be used on the 2×3 Baby Graphic with the bed in normal position, employing extreme wide angle lenses like the 47 mm. Super Angulon requires that the bed be dropped to avoid its appearing at the bottom of the image.

There are some other, less common lenses that one might consider; I speak not from personal experience but from a perusal of Kerry Thalmann’s Large Format Home Page, in particular his discussion of “Lightweight Lenses.”  For “normal” lenses, one might consider a 90mm. f/6.8 Schneider Angulon, a Dagor-type lens with six elements in two groups.  Postwar coated Angulons or those branded by Linhof are preferred as being of more consistent quality.  The 90 mm. f/6.3 Wide Angle Congo is also a possibility, although the quality of the Congo lenses may be variable.  In the short telephoto range, consider the 150 mm. f/6.3 Fujinon W, a four element, three group, Tessar design; the 150 mm. f/5.6 Schneider Xenar; and the 150 mm. f/9 Schneider G Claron.  In the 180-200 mm. range, the 180 mm. f/9 Fujinon A, the 200 mm. f/8 Nikkor M, and the 203 mm. f/7.7 Kodak Ektar are possibilities.  These all use shutters of Copal #0 size and have a good chance of fitting into the small Baby Crown Graphic lens boards.  It may be advisable to borrow one of these lenses and check the fit before purchasing.  Many of the more modern lenses are singly or multiply coated, with consequent increases in image contrast.  One caution, however: one’s geographic locale should be taken into account when considering lenses of f/8 or f/9 maximum aperture.  While these will be fine in desert sunlight, use of a lens with a maximum aperture f/8 or higher in low light conditions such as my typically overcast and cloudy Pacific Northwest weather and heavy tree cover may be quite a challenge.

Graphic Roll Film Backs:

The nomenclature and evolution of the Graflex camera back and its associated film holders is both complex and confusing.  This has been summarized on the Pacific Rim Camera page “Graflex Backs and Film Holders.”  This entry will focus on the  backs available for the 2×3 Baby Pacemaker Crown Graphic

Graphic Roll Film Holders: Original with Knob Winder (right) and Later Lever Action (Left)

Graphic Roll Film Holders: Original with Knob Winder (right) and Later Lever Action (Left)

Roll film holders for the 2×3 Baby Graphic were available in three formats: 6×6 cm., 6×7 cm., and 6×9 cm. The earlier model holders are designated either as “22” or “23”, the “22” indicating  6×6 cm. (2×2 in.) format, while the “23” indicated 6×9 cm. (2×3 in.) format. With the introduction of the 6×7 format, the designation changed to RH12 (6×6), RH10 (6×7) and RH8 (6×9). The number described the number of exposures obtained on a roll of 120 film. Other holders were designed for 220 film using a different pressure plate.

The original models utilized a knob to advance the film, while later models employed a lever for film advancing.  The designation “Singer”, often applied to these lever-action film holders, comes from the fact that the Singer Sewing Machine Company owned Graflex for some time and marked its film holders accordingly.

There has been considerable discussion about the difference in film flatness between these two models, as the lever-advance models had rollers to hold the film in place.  I use the older model holders and have not had a problem with film curling so far.  Doug Daley, of the Camera Clinic in Seattle, notes that, while the lever-action models have the advantage of the rollers, they also use a lever return spring which has a tendency to break and is almost impossible to replace.

It is important to note that the Graflex holders advance film based on the number of rotations of the internal rollers, not on the appearance of numbers on the paper backing.  Using the numbers on the backing, which is the case for all 120 roll film cameras and the detachable Rollex backs used on vintage plate cameras, ensures that images are evenly spaced.  With the Graflex backs, image spacing is dependent on the gearing built into the back, and can in theory be inaccurate if film thickness changes.  It has been said that modern films are slightly thinner than films produced in the 1950s, and this is a potential source of frame misalignment.

Noting that the edge of my first frame was cut off on my first rolls with the Baby Graphic, I tested frame spacing using a roll of outdated film, tracing each frame onto the film with the dark slide removed.  I found that both of my backs started the first frame too close to the beginning of the roll, indicating that the modern-day Kodak paper leader was slightly shorter than those produced in the 1950s.  After the first frame, image spacing was not a problem, indicating that film thickness for practical purposes was not a consideration.  Noting that there was room for a ninth frame at the end of the roll, I now start my pictures on the second frame, then wind the knob 1 1/2 turns after the last frame to obtain my eighth shot.

The Kalart Rangefinder:

A most useful accessory, found on many Graflex cameras, is the Kalart Rangefinder.  This is most often mounted on the side accessory bar, but may, in later models, be mounted on the top of the camera.  Depending on the amount of use (or abuse) to which it has been subjected, the rangefinder may or may not be functional and accurate.   If not properly aligned, the adventurous reader may undertake to disassemble, clean, and recalibrate the unit.  Disassembly and realignment of the Kalart is well documented at Jo Lommen’s posting “The Kalart Rangefinder.”  One word of caution, however.  Doug Daley, owner of the Camera Clinic in Seattle, notes that trying to readjust the Kalart rangefinder is a “…real pain in the neck…”  If Mr. Daley, who is a master technician of many years experience, feels thus about the Kalart, I would tend to approach disemboweling it with considerable trepidation.  Consequently, one may wish to explore all other possible options before advancing on one’s Kalart with screwdriver and lighter fluid in hand.

If one is fortunate, adjustments to the Kalart can be treated conservatively.  On receiving my Baby Graphic, I discovered that the two images in the rangefinder could not be aligned.  Fortunately, my rangefinder was equipped with the external adjustment screw, and a few twists brought the images into perfect alignment.  Then, using my 101 mm. Ektar, I focused a crisp image at infinityon the ground glass and reset the infinity stops on the focusing rail.  The rangefinder proved to be quite acceptably accurate at all distances, eliminating the need for further adjustments.

It should be noted that the Kalart is best set up for one lens, and changing its calibration to a lens of different focal length is not a small matter.  The Kalart itself is connected via a dedicated cam to a linkage which is in turn coupled to the movement of the front focusing rail.  Resetting the mechanism to a different focal length lens involves disassembling the cam connector, changing out the cam, and reassembling the linkages.  My Kalart is calibrated to my 101 mm. Kodak Ektar; for other lenses, I use the ground glass.

References:

“Adjusting the Kalart Rangefinder.” Online Posting, Graflex.org.  http://graflex.org/speed-graphic/kalart-adjustment.html

Butkus, M.  “Pacemaker Graphic, Speed graphic and Crown Graphic.”  http://www.butkus.org/chinon/pacemaker_graphic_speed_crown/pacemaker_graphic_speed_crown.htm

Butkus, M. “Pacemaker Graphic.”  http://www.butkus.org/chinon/pacemaker_graphic/pacermaker_graphic.htm

Butkus, M.  “Graflex Pacemaker Crown Graphic/Speed Graphic.”  http://www.butkus.org/chinon/graflex/graflex_pacemaker_crown_speed/graflex_pacemaker_crown_speed.htm

Frederick, Todd.  “Modern Lenses for 2×3 Graphic?”  Photonet Online Posting.  http://photo.net/medium-format-photography-forum/001HwX.

“Graflex Backs and Film Holders.”  http://www.pacificrimcamera.com/pp/graflex/backs.htm.

Graflex.Org Web Site.  http://graflex.org/.

“The Kalart Rangefinder Adjustment Manual.”  http://graflex.org/speed-graphic/kalart-manual.html

Karp, David.  “The Pacemaker Crown Graphic as a Field Camera.”  http://www.largeformatphotography.info/cameras/pacemaker/.

Kingslake, R.  “A History of the Rochester Camera and Lens Companies.”  http://graflex.org/articles/kingslake/.

Lommen, Jo.  “The Kalart Rangefinder.”  http://www.xs4all.nl/~lommen9/kalart/index.html

Lommen, Jo.  “5 Ways to Focus the Graflex Camera.”  Online Posting.  http://www.xs4all.nl/~lommen9/focus/index.html

“New York on Fire: Images From the Gordon Archive.”  http://www.weegee.org/

Thalmann, Kerry.  “Lightweight Lenses.”  http://www.thalmann.com/largeformat/lightwei.htm.

Wikipedia articles on Press Camera, Speed Graphic, and Weegee.

“Weegee’s World.”  International Center of Photography.  http://museum.icp.org/museum/collections/special/weegee/.

“Weegee: Biography and Exhibition of the American Photographer in the Fotomuseum, Winterthur, Switzerland.  http://www.cosmopolis.ch/english/cosmozero/weegee.htm.

Selecting a Vintage Camera III: Plate Cameras

One option for vintage fine art photography using roll film is the “plate camera”.  Although many cameras manufactured between the late 1800s and the 1930s used glass plates, this term is often used specifically to refer to a type of small folding camera, usually in 6×9 or 9×12 cm format, designed specifically to use small glass plates or sheet film.  These cameras can be fitted with 120 roll film backs, available on eBay, in place of plate holders.  The small plate camera is actually quite an early design, with the first models being produced around 1915 (see the KW post).  Production continued into the late 1930s, when glass plates were no longer a popular medium and these models were largely superseded by 35mm and more modern medium format cameras.

Voigtlander Bergheil


The camera shown here, the Voigtlander Bergheil, is one of the best known of its type, and illustrates the typical features of this class of cameras.  This is a very functional, professional-quality camera equipped with the famous Heliar lens.  In addition to its superb mechanical and optical qualities,  the Bergheil’s fame derive in part from its association with Brassai, one of the greatest figures in 20th century photography.  A Hungarian painter, sculptor

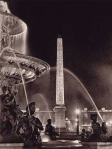
From Paris By Night by Brassai

and author who moved to Paris in 1924, Brassai studied photography under the Hungarian master Andre Kertesz.  Wandering the streets of Paris at night with his Bergheil, Brassai captured the beauty of the streets and gardens in rain and mist.  Wikipedia’s entry on Brassai states: ” …he captured the essence of the city in his photographs, publishing his first book of photographs in 1933 titled “Paris de Nuit” (“Paris by Night”). His efforts met with great success, resulting in his being called “the eye of Paris” in an essay by his friend Henry Miller. In addition to photos of the seedier side of Paris, he also provided scenes from the life of the city’s high society, its intellectuals, its ballet, and the grand operas. He photographed many of his great artist friends, including Salvador Dalí, Pablo Picasso, Henri Matisse, Alberto Giacometti, plus many of the prominent writers of his time such as Jean Genet, Henri Michaux and others.”  It should be noted that this early work with the Bergheil was done without the benefit of a telephoto or wide angle lens.

Folded, the Bergheil looks like a small, leather-covered box five to seven inches in maximum dimension, with a leather handle on the top and, in most cases the rear half of a flip-up viewfinder on the left side. Opened, it displays a rear ground glass screen with a fold-out focusing hood.  Once the image has been composed and focused on the ground glass, the focusing screen assembly slides upward in its tracks, and can be replaced by a glass plate or sheet film holder, or by a 120 roll film holder.

Pressing a concealed button on the top of the camera allows the front plate to flip down, forming the base plate for the focusing rails and exposing the front standard, lens, and bellows.  The front standard is usually then pulled out to an infinity stop and locked in place, after which focusing is accomplished using the rack and pinion controlled by the knurled focusing knob at the front of the base plate.  The term “Double Extension” is frequently applied to this mechanism, referring to the fact that there are two sets of focusing rails, the upper set attaching the front standard to the upper base plate, while the lower set, equipped with the rack and pinion assembly, moves the upper base plate and lens assembly back and forth on the lower base plate to accomplish fine focusing. A few models, particularly Agfa plate cameras, are equipped instead with a focusing lever and helical focusing screws incorporated into the front standard, eliminating the need for the lower focusing rail.

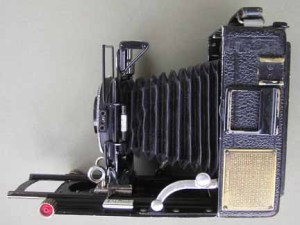
Bergheil Side View

Most small plate cameras of this era are equipped with thumb screws controlling a small amount of vertical rise and fall and lateral shift of the front standard.  Most unfortunate is the fact that there is no vertical tilt or horizontal swing, precluding any use of these movements to allow for greater depth of field.  There are no rear movements.  Three methods of composing the picture are usually available: a waist level finder, a swing-out wire finder attached to the front standard, and the ground glass focusing screen, the latter being the slowest but most accurate. Most cameras are equipped with a fixed “normal” 100-105 mm lens, with only a few of the higher-end plate cameras having provision for interchangeable lenses.

What are the advantages of a small plate camera over the folding cameras discussed to date?  The front rise and shift are useful for perspective control when photographing buildings, but are not of significant help in most other settings.  Front tilt, of tremendous utility for control of depth of field, is absent.  What one does gain is the ability to focus accurately on the ground glass,  allowing composition without parallax.  Macrophotography can be carried out readily, and close focusing can be evaluated with accuracy.    Furthermore, the camera is relatively compact and easy to carry.  One significant advantage is that, if more than one film holder is available, one can switch readily between color and black and white film without carrying a second camera body.

Zeiss Tropen Adoro 1927-35

The Bergheil is a classic example of the 1920s small plate camera.  However, this format was extremely popular with advanced amateurs and professionals needing a compact, high quality camera.  As a result, this type of small plate camera was made in significant numbers by a large number of manufacturers, including Agfa, Zeiss, Kodak, Ihagee and Ica, and there are a large number on the used market on eBay today.

Rollex 120 Film Holder

Holders for 120 roll film can be purchased separately either on eBay (usually the least expensive option) or from various online stores.  These slide into the rear tracks that hold the ground glass and plate holders.  After focusing the image on the ground glass, one slides out the ground glass and viewing hood, and slides in the film holder.  After positioning the holder, the dark slide on the holder is removed, the exposure is made, and the dark slide is replaced.  Using the small red window located under the small sliding door on the back of the holder, the film is advanced, and the next exposure can be made in the same manner.

One cautionary note must be made for anyone considering purchasing an Agfa plate camera: Agfa’s famous (or infamous) “Green Grease.”  In the 1920s, Agfa lubricated its cameras with a clear grease that worked well at the time, but over the decades reacted with the brass fittings to form a material reminiscent of epoxy resin, efficiently cementing moving parts in place.  This can be washed out with diligent use of solvent from reachable elements such as focusing rails, but is extraordinarily difficult to remove from the helical focusing threads used on many Agfa plate cameras.  A variety of methods have been proposed for freeing frozen threads gummed up with polymerized deposits of this lubricant: online postings suggest that heat is probably the best option.

References:

“Agfa’s Green Grease.”  The Classic Camera Repair Forum. http://www.kyphoto.com/classics/forum/messages/15681/10484.html?1204729679

Wallage,  Peter.  “Peter’s Plate Camera Page.”  Online posting.  http://www.peterwallage.com/plate%20cameras.htm.

Selecting A Vintage Camera II: Kodak Cameras.

Few individuals have had more impact on photography, not to mention on society itself, than George Eastman.  In 1878, Eastman, then a young bookkeeper in the Rochester Savings Bank, read about Charles Bennett’s improvements to the gelatin dry plate process and began to produce his own plates.  By July 1879, he had patented a machine for coating glass photographic plates.  Combining income from the sale of  licenses for the process with $1000 from local buggy-whip manufacturer Thomas A. Strong, he founded the Eastman Dry Plate Company in 1881.  In 1889, the company introduced celluloid roll film, and in 1892, changed its name to the final form, the Eastman Kodak Company.  The origin of “Kodak” has always been something of a mystery; the most accepted explanation is that Eastman, always fond of the letter “K”, composed the name on an anagram set with the help of his mother.

The first cameras were simple wooden boxes, with the shutter cocked by a string dangling out of the body.  Nevertheless, the original model  was a landmark achievement, being

No. 1 Brownie, circa 1901

small, lightweight, and having the simplicity of roll film rather than glass plates.  Eastman was greatly aided in his camera development by Frank Brownell, a cabinet maker who turned to the manufacture of cameras in the early 1880s.  Brownell designed most of the early Kodak cameras, and was responsible for the design of the famous Brownie cameras, which for the first time brought snapshot photography within reach of the masses.

Once Kodak was firmly established in the consumer mass market, Brownell was instrumental in helping Eastman develop folding roll film cameras that appealed to the more serious photographer. These early folding “satchel” Kodaks displayed a square body

No. 5 Cartridge Kodak, 1898-1907

with a drop front forming the bed and focusing rail, while the top opened. to reveal the roll film holder.  While large and bulky, they established a style of camera that, starting around the turn of the century, was to evolve into the small folding camera that was to dominate photography for the next forty years.  Film came in various  sizes, ranging from the relatively small 120 negative to the mammoth 7″ rolls of 115, designed for 7×5 in. vertical images with the No. 5 Cartridge Kodak.  Beautiful videos of these early folding cameras are available on Jos Erdkamp’s web site at http://www.kodaksefke.nl/.

While the box cameras were simplistic and cheap, and the large folding cameras filled the needs of the professional and sophisticated amateur, what was needed was a compact camera with more features than the simple box.  The first camera to fill this gap – and, incidentally, to set the template for the next century of roll film camera production – was another of Frank Brownell’s creations, the Folding Pocket Kodak of 1897.  This

Folding Pocket Kodak, 1897 (Courtesy George Eastman House Collection)

unassuming little camera, with its single speed shutter and simple f/11 Achromatic lens, displayed three groundbreaking features: it used a bellows to collapse into a compact form that truly fit a pocket or small bag, it could be quickly loaded with readily-available roll film, and it introduced the 2 1/4 X 3 1/4 (6×9 cm) image that is still the standard for medium format today.Subsequent evolution was rapid.  By 1900, the drop front and focusing rail had replaced the struts of the original Folding Kodak (see Folding Kodak ad), and by 1902-3, models of the Folding Kodak were available with variable speed shutters and apertures, as well as

No. 4A Folding Kodak, 1906 (Courtesy George Eastman House collection). Note pull-out front standard, pneumatic shutter and aperture f-stop scale.

rising fronts for architectural work.  This simple and functional design had a long life, with cameras of this type being manufactured well into the 1930s by both Kodak and many other manufacturers worldwide.  Unfortunately, most of these beautiful old machines use film sizes that are no longer available and thus are strictly decorative.

Kodak Corporation had such a profound impact on the art and science of photography that it is easy to overlook George Eastman as a historical figure. A unique, caring and talented individual, he cared deeply about his many employees, frequently dispensing large portions of his considerable personal fortune to provide bonuses for his workers.  His social  philosophy, years ahead of his time, led him to institute a program of dividends and profit-sharing at Kodak. He was an extraordinarily generous philanthropist as well as an art collector.  An extraordinarily creative inventor and innovator, he was one of the first American industrialists to employ a full-time research scientist.  Plagued by serious ill health in his later years, he gradually gave away most of his fortune, wrote a note to his friends, and made the decision to take his own life on March 14, 1932 at the age of 77.

Given the millions of cameras produced by Kodak, with the multitude of models  and the many lens and shutter combinations, the job of describing the best Kodak 120 roll film cameras for fine art work should be overwhelming – but it isn’t.  Remember Kodak’s great experiment in the 1930s and 1940s (the heyday of roll film camera production) with 616 and 620 film?  This axed Kodak’s contribution to today’s menu of usable roll film cameras.  A list of Kodak’s models using 120 film is available on Mischa Konig’s excellent web site “Kodak Classics” (http://kodak.3106.net/index.php?p=206).  It is shockingly short, and many of the models noted are simple box cameras, which makes Kodak’s contribution to the list of folding vintage cameras using medium format film and suitable for fine art photography very short indeed.  Mr. Konig comments: “Kodak ceased production of 120 roll film cameras in the mid 1930’s, with the introduction of the 620 size, which is the same film on a slimmer spindle, and the only subsequent 120-film cameras from Kodak were manufactured in the UK in the 1950’s and ’60’s. The last 120-roll film camera from Kodak was probably the UK-made Brownie Cresta 3.”

Nevertheless, there are a few folding vintage Kodaks that use 120 film and take extremely high quality images; these all date from 1914 to the late 1920s.  Much of the best work on this site has been produced with two such cameras costing a total of $40.00.  For me, the greatest appeal of working with cameras of this vintage is the satisfaction proving that such neglected old relics can produce work that is of gallery quality in an era of multi-megapixel digital imaging.

Kodak’s designation of its constellation of roll film folding cameras is confusing, and different names were not uncommonly applied to the same model during the course of the production run.  It is also important to remember that the numerical designation of  many Kodak cameras in the 1920s referred not to the order of production but to the film size.  An excellent source of well-organized information on early Kodak cameras and their complex nomenclature is Brian Coe’s Kodak Cameras: The First Hundred Years.  An excellent description of Kodak lenses, unfortunately including only those from the 1930s on, can be found on Camerapedia at http://www.camerapedia.org/wiki/Kodak_lenses.

The most important consideration in deciding to purchase one of the many early classic Kodak camera is the lens.  Many old Kodaks had only simple single-element meniscus

Meniscus Lens in Ball Bearing Shutter - Note Absent Front Lens Element and Bowl-Shaped Shroud

lenses.  Meniscus lenses are identifiable by the presence of a metal front cover on the lens housing with a bowl-shaped depression surrounding a central opening and the absence of a visible front glass element.  These lenses will not produce sharp images and should be avoided.  The most common useful lens found on folding cameras of the 1914-1920 vintage is the Rapid Rectilinear, which, if used at apertures of  f/16 or smaller, can yield stunning results.  With cameras produced in the 1920s, look for an f/6.3 or f/7.7 Anastigmat.  Less common lenses include the Tessars (either Bausch and Lomb or Zeiss), or, in the case of Kodaks manufactured in the U.K., the Ross Homocentric, Ross Xpres, Cooke Aviar (f/4.8 or f/6.3) or Cooke Series III.

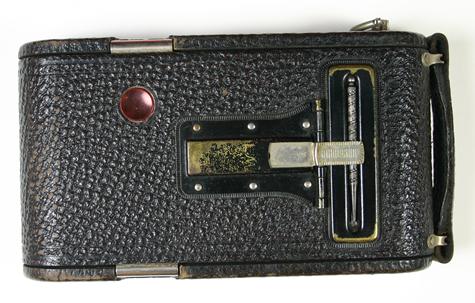
Mention needs to be made of the Autographic feature, the 1920s equivalent of the modern databack.  Found on many Kodak cameras until 1932, the Autographic feature consisted

Autographic Door, Pre-1916 Version on No.1 Kodak Junior

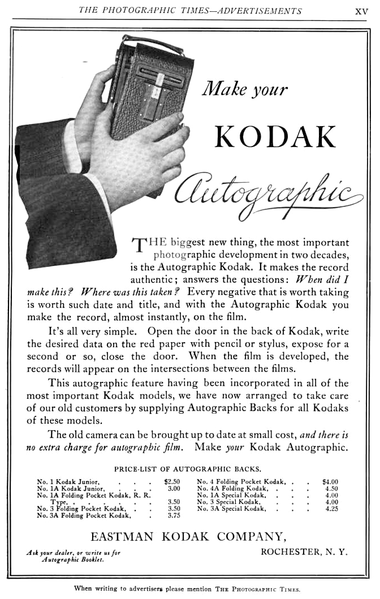
of an elongated door that opened in the back of the camera, exposing the backing paper of the film.  Kodak Autographic Film permitted a message to be written on the film between frames. The spool was wound with a layer of carbon paper between the film and thin red backing paper. After taking a photograph, the user would open up the small door on the back of the camera and, using the provided stylus, inscribe a brief note. Pressure of the stylus on the backing paper transferred the carbon to the backing paper. The user then held the camera back to the light for a moment and light passing through would image the message on the film (http://www.clickondavid.com/no1a.htm).  Different door styles were used through the years, and can be used to date Kodak cameras of this vintage; the image shown here is the earliest (pre-1916) version.  For a full description of the Autographic feature, see Mischa Konig’s article on his Kodak Classics web site at http://kodak.3106.net/index.php?p=511.

Kodak Ad for Autographic Back (From the Photographic Times v. 47 (1915), courtesy Wikipedia)

Not only is the Autographic feature an important characteristic of early Kodak cameras, its story is fascinating in itself.  During the early part of the twentieth century, Kodak absorbed a number of camera companies, gaining many important features and subsidiaries.  These have been described in Rudolf Kingslake’s “A History of the Rochester, NY Camera and Lens Companies.”  Kodak’s story intersected that of Henry Jacques Gaisman in 1914.  Gaisman, the son of French immigrants, was too poor to attend college, but proved to be a capable inventor and canny businessman. After inventing the glass-enclosed bulletin board at age 16, he patented the design for the safety razor in 1904.  This was eventually adopted by the Gillette Razor Corporation, and Gaisman became the head of the company after Mr. Gillette’s death.  In  1914, Gaisman invented the autographic camera back, and immediately sold it to Kodak for the considerable sum of $300,000.  George Eastman wasted no time incorporating this feature into his cameras, with the first autographic backs appearing by December of 1914.  A further note on this fascinating man is that, after living into old age as a confirmed bachelor, at the age of 82 Gaisman married Kitty Vance, a 33 year old nurse.  They lived happily together until his death at the age of 104 in White Plains, New York.

One important note in purchasing an early Kodak Camera:  A No. 1 camera and a No. 1-A camera are not the same!  The two designations, though sounding similar, refer to completely different film sizes.   Kodak cameras designated as “No. 1”, except for the earliest models, use 120 film, while cameras designated as “No. 1A” take the discontinued 116 film, which was one of the most popular sizes during the 1920s.  The dimensions of 120 are 2 1/4 x 3 1/4 in or 6×9 cm, while 116 is a much larger and longer negative at 2 1/2 x 4 1/2 in.  The two models can be distinguished by the much longer body of the 1A camera.

1915 No. 1 Kodak Advertisement, Duke University Collection

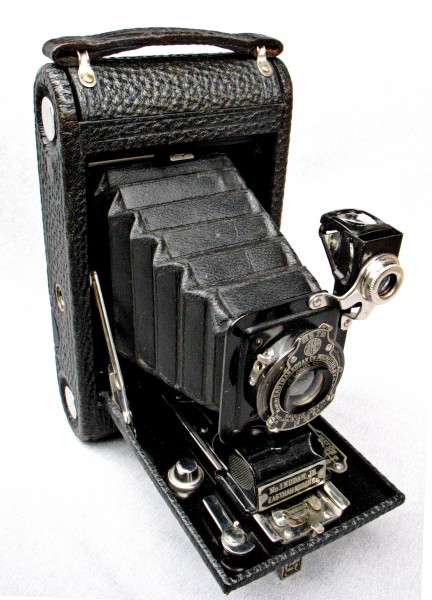
One of the earliest roll film cameras capable of doing fine art work is the No. 1 Kodak Junior, used to produce  a number of the images on this site.  First manufactured in April

No. 1 Kodak Junior

of 1914, the non-autographic version was discontinued in December 1914 after a production run of 33,000 in favor of the version with the autographic back, the No. 1 Autographic Kodak Junior.  The latter was made until 1927, with a total production of well over 800,000.

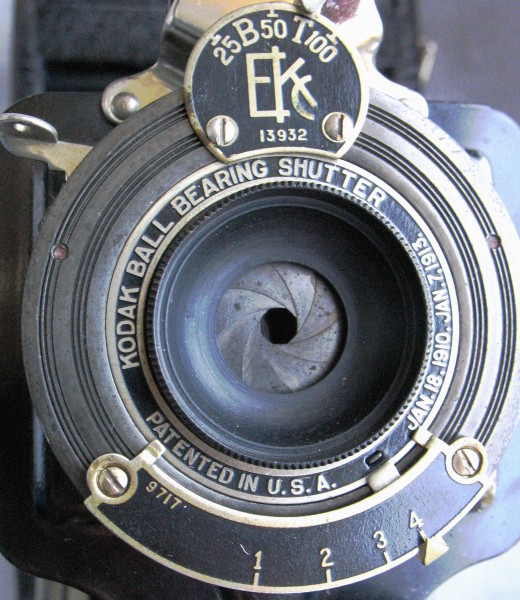
The No. 1 Kodak Juniors were typically equipped with a meniscus lens or a Bausch and Lomb Rapid Rectilinear, the latter being most common.  The above 1915 advertisement mentions the option of an f/7.7 Anastigmat lens; the number of cameras produced with this option must have been small, as they almost never appear on eBay.  Many of the older models have the f/ scale calibrated in the old “U.S.” system in which the maximum aperture is designated as f/4, which translates to approximately f/8 in the modern system (see “The US f-Stop System” posting, which is in preparation).  The shutter is a Kodak Ball Bearing Shutter with four speeds: 1/25, 1/50, T and B.  The Kodak Ball Bearing Shutter is simple, unsophisticated, unlubricated (hence no oils to gum up) and virtually indestructible.

The camera is easily loaded by removing the J-shaped back.  The small

Placing More Filtering in the Film Counter Window

plastic film counter window typically contains colored plastic of an orange tint.  While this was adequate with the slow emulsions of the 1920s or the heavy paper backing of autographic film, it is too light for modern fast emulsions, and light leaks can occur.  The easiest solution is to use a pair of tweezers to slide two layers of thin red plastic between the flat spring film flattening plate and the inside surface of the orange plastic window, and then glue the plastic pieces down over the window with a small amount of silicone rubber sealant.  If the plastic is missing or broken, gently lift the outer leather covering around the opening on the back of the camera, and slide the red plastic between the leather and the aluminum back plate of the camera.  The leather can be re-glued with white tacky craft glue, thus re-securing the backing and holding the plastic in place.

Once the front is pulled down to form the base plate, the front standard can be pulled out to extend the bellows.  Focusing is by three small click stops at the base of the front standard.  There is, unfortunately, no eye level finder.  If the camera is in good condition, the only real problem that one not infrequently encounters with cameras of this vintage is deterioration of the silvering of the viewfinder mirror.  One solution to this problem is to buy one or two extra No. 1 Juniors to use for parts (they are cheap, after all, with some going for $10-15 on eBay) and mounting the best mirror on the camera chosen for use.  The viewfinder readily screws off by removing the chromed threaded ring holding it to the frame.

No. 1 Kodak Series III

The No. 1 Kodak Series III is an excellent choice for a low-cost camera capable of making excellent images.  My No. 1 Kodak is fitted with the 105 mm f/6.3 Anastigmat in a Kodex shutter with speeds of 1/10, 1/25, 1/50, 1/100, T and B.  Focusing is accomplished by pulling the front standard out to the stop, then using the thumb screw at the lower left of the standard for fine focusing.  As with the No. 1 Kodak Junior, there is only a waist level viewfinder mounted on the front standard.  One interesting and decorative feature of this model is the rotating exposure calculator built into the aperture lever.  For each f-stop, the engraved scale matches “DULL”, “GRAY”, “CLEAR”, AND “BRILLIANT” with the appropriate shutter speed.  Calculating backward using the Sunny f/16 Rule (discussed elsewhere in this blog) indicates that the film intended for this camera in the late 1920s had an ISO rating of approximately 25.

Other, less common models to consider among early Kodak roll film  cameras are the No. 1 Pocket Kodak, the No. 1 Pocket Kodak Junior, and the No. 1 Pocket Kodak Series II, some of which came equipped with the f/6.3 or f/7.7 Anastigmat.  These were manufactured from the 1920s until 1932.  A somewhat earlier model to consider is the No. 1 Autographic Kodak Special Model A, produced from 1915 to 1920.  Only 18,000 of these cameras were produced, so they are encountered only occasionally.  These were equipped with a variety of lenses including the Zeiss Tessar or a variety of Anastigmats made by Bausch and Lomb, Zeiss, or Cooke.  UK variations may be found with a Cooke Aviar, Ross Xpres or Homocentric, or even a Lacour-Berthiot Olor Anastigmat.

Brownie Camera Ad, Duke University Collection

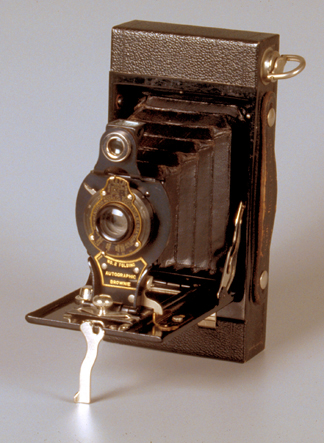
If one wishes the challenge of using a very early Kodak roll film camera, one might consider the No. 2 Folding Autographic Brownie.  The Brownie series, inspired by George Eastman’s brilliant designer Frank Brownell, represents a separate and enormously successful branch on the evolutionary tree of Kodak cameras.  It is unclear whether the Brownies were named after Brownell or Palmer Cox’s enormously successful cartoons and books about Scottish fairies, but Kodak borrowed extensively from Cox’s engaging cartoons in their advertising.

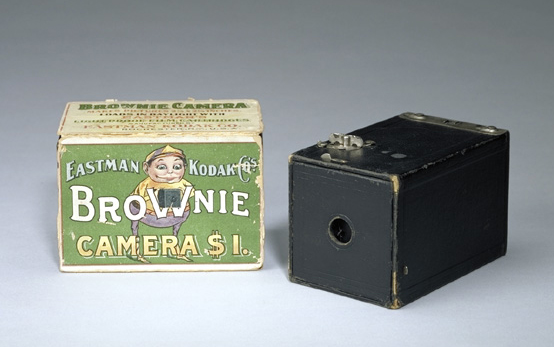
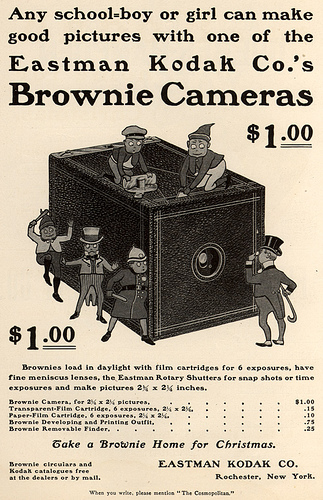
Advertisement for the Original Brownie

Designed as a simple box camera suitable for use by children, the first Brownie was made of cardboard and retailed for $1.00.  From this early model (whose patent can be viewed at http://www.google.com/patents?vid=725034), the Brownie line expanded to a line of box and folding cameras produced into the 1980s that truly brought photography within reach of the masses.

No. 2 Folding Autographic Brownie

The No. 2 Folding  Autographic Brownies are very simple cameras, many of which were equipped only with a meniscus lens, but those provided with a Rapid Rectilinear lens should be capable of producing quality pictures.  Note that a 120 film camera is “No. 1” in the regular line of Kodak cameras, and “No. 2” in the Brownie line.  Unlike later roll film cameras, the Brownie is opened by releasing a sliding front catch and lifting off the entire front assembly bearing the baseplate, bellows, and front standard.  The Kodak Ball Bearing Shutter has speeds of 1/25 and 1/50 sec in addition to T and B.  focusing is by click stops at the front of the focusing rail.  Many of these old folding Brownies will use the US f-stop system (see my posting on this topic).  Dating the camera can be done by the presence or absence of the autographic feature (introduced in Feb 1916), a rounded case configuration (changed from square ended in Jan 1917), and the shape of the support foot (changed from S to C shape in Oct 1919).

NOTE:  If you should wish to use a classic Kodak camera that takes 620 film, it is possible to respool 120 film onto 620 spindles.  This is an inconvenience, particularly if one wishes to do any significant amount of photography.  Alternatively, 620 film could at one time be purchased from Film for Classics in Rochester, New York.  Their site is www.filmforclassics.com

References:

Baker, Chuck.  “The Brownie Camera Page.” http://www.brownie-camera.com.

Bellis, Mary.  “History of Kodak and Rolled Photographic Film.  http://inventors.about.com/od/estartinventors/ss/George_Eastman.htm.

Camerapedia and Wikipedia articles on Eastman Kodak, Kodak Lenses, Henry Jacques Gaisman, Frank Brownell, and Palmer Cox.

Coe, Brian.  Kodak Cameras: The First Hundred Years.  Hove Collectors Books, West Sussex, 2003.

Cox, Palmer.  “The Origin of the Brownies.”  Ladie’s Home Journal, 1892.  Cited in “The Brownie Camera Page”, http://www.brownie-camera.com/articles/origin/origin.shtm.

George Eastman House Online Collection. http://www.geh.org/technology.htm.

Kingslake, Rudolf.  A History of the Rochester, NY Camera and Lens Companies, Online Posting, http://www.nwmangum.com/Kodak/Rochester.html.

Kodak Corporation web site.  “George Eastman”, http://www.kodak.com/global/en/corp/historyOfKodak/eastmanTheMan.jhtml?pq-path=2217/2687/2689.

Konig, Mischa.  “Kodak Classics.”  http://kodak.3106.net/index.php.  An excellent source for information on classic Kodak cameras.

Living Image Vintage Camera Museum. “Autographic Kodaks.” Online Posting.  http://licm.org.uk/livingImage/Kodak-Autographic.htm.

Mc Keown, Jim, and McKeown, Joan.  Collectors Guide to Kodak Cameras.  Centennial Photo Service, Grantsburg, WI, 1981.

Selecting a Vintage Camera I: Roll Film Cameras

A number of cameras manufactured between 1910 and 1950 are eminently suitable for high-quality fine art photography, while many more are, for one reason or other, best left as bookshelf decorations. Photography lovers are fascinated by classic cameras and how they used to function, in fact, there are blog posts such as https://www.hooliganrocknroll.com/a-snapshot-of-3-cameras-from-the-past/ that can provide a quick overview of what they started out as to what we have now.

The first consideration is film size. Over the last 100 years, Kodak has produced roll film in a multiplicity of formats from the tiny disc and 110 sizes through 35mm up to 7×5 inch “Postcard” widths (http://en.wikipedia.org/wiki/Film_format). Over the years, the majority of these formats have been eliminated, and roll film is presently available primarily in 35mm and 120 sizes, together with 4×5, 5×7, and 8×10 sheet film. Consequently, many cameras from 1910-1930 are unusable without modification because film is no longer available. Fortunately, 120 film was in use as early as 1901, and many fine cameras are available that use this film size. Although 35mm is also a common format in the vintage camera market, I have elected to work exclusively with medium format cameras using 120 film because of the higher image quality inherent in the larger negative. Despite the superb images possible with large format (4×5 and larger), I have avoided formats larger than 120 because of the difficulty and expense inherent in getting large format sheet film developed, scanned and printed. Consequently, all of my vintage photography is done with cameras using 120 roll film.

One thing you should be aware of: Kodak’s ill-fated (to my mind) experiment with 620 film. 620 is basically 120 film spooled onto a narrower spindle with smaller end flanges. Consequently, today’s 120 rolls are too big to fit into a camera designed for 620 film. Since a large proportion of Kodak’s cameras from 1932, when 620 was introduced, through the 1940s used 620 film, there are vast numbers of Kodak roll film cameras that cannot be used with off-the-shelf film. There are a number of ways in which 120 can be used in a 620 camera, including rerolling 120 film onto 620 spindles in total darkness, or trimming off the edges of the flanges on the 120 rolls (see Camerapedia’s entry on these workarounds at www.camerapedia.org/wiki/620_film), but to my mind, the nuisance factor is just too great, and my 620 Kodak cameras are gracing the ends of my bookshelves. Fortunately, European camera manufacturers never bought into the 620 concept, and all of the European medium format roll film cameras employed 120 film.

620 (Left) and 120 (Rilght) Film Spools

620, 120 Metal, 120 Plastic, and 120 Wood Film Spools

The second consideration is the lens type. A camera is a box with a lens on one end and film on the other. If either of the two is suboptimal, it’s not worth snapping the shutter. Many vintage lenses are of superb quality, and some, such as the Heliars and Ektars, are legendary. Others, such as the single-element meniscus lenses, are best avoided. Lenses will be discussed below and elsewhere in this blog.

My primary source for vintage cameras is eBay. A few dealers sell vintage cameras on line, but their prices are typically high. There are risks to buying vintage equipment on eBay, and one should be prepared to do some degree of cleaning and restorative work on most purchases. Restoration techniques will be discussed later. The buyer is strongly advised to peruse the seller’s pictures and descriptions carefully for signs of rust, worn bellows, and defective shutters. Do not be afraid to ask questions of the seller, and do not hesitate to send back a camera that is not as described. With luck, one may acquire a half-century old treasure that looks as if it was just taken off the shelf. However, even under the best of circumstances, one should be prepared to acquire a few cameras that are destined to spend their lives as bookends.

There are a number of excellent references on classic cameras. Many of these are listed in Camerapedia’s list of photographic references at http://www.camerapedia.org/wiki/Sources:_English_language#British_cameras. Naturally, the bible of classic camera aficionados is James and Joan Mc Keown’s wonderful tome McKeown’s Guide to Antique and Classic Cameras. This huge volume is much more than a price guide, being the one source where information on cameras of the last 150 years is summarized in one place.

The following is a summary of my thoughts regarding a number of models of vintage medium format cameras suitable for fine art work. The list is by no means all-inclusive, and there are a number of fine cameras with which I have only limited familiarity. The reader may find it useful to consult David Silver’s excellent article on classic roll film folding cameras on the International Photographic Historical Society’s web site at http://www.photographyhistory.com/cc2.html.

AGFA/ANSCO:

Agfa, founded in Berlin in 1867 as a manufacturer of photographic chemicals, most prominently the film developer Rodinal, produced cameras under its own name in Germany from 1925 until 1983. Folding 120 roll film
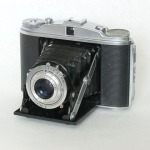
The Agfa Isolette

The Agfa Isolette

cameras included the 6×6 cm Isolette series, produced from 1938 until 1960. Agfa’s 6×9 cm cameras were the Billy Record series, introduced in 1927; these varied from very basic, entry-level cameras to some very respectable units with rangefinders and Compur shutters. Isolette and Billy cameras came equipped with one of three lenses: The basic Agnar , the Apotar (a triplet), and the Solinar (a four-element Tessar design). Even the midrange Apotar lens has been described as producing images of excellent quality. See Darryl Young and Jurgen Kreckel’s informative web sites for a more in depth discussion of Agfa cameras and some examples of the image quality obtainable with Agfa lenses at http://www.cleanimages.com/Article-MediumFormatInYourPocket.asp and http://www.certo6.com/index.html.
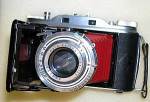
Agfa Billy Record III

Agfa Billy Record III

E. & H. T. Anthony & Co., begun in 1842, was the oldest American manufacturer of cameras and photographic supplies. Scovill Manufacturing Company, likewise founded in the 1800s and the second largest photographic supply company in the U.S., purchased American Optical Company in 1871, and in 1889 was renamed Scovill and Adams. In 1902, these two photographic giants merged to form Anthony and Scovill. In 1907, the name was shortened to Ansco and the company was moved to Binghamton, New York. In 1928, Ansco merged with Agfa’s US subsidiary to form Agfa-Ansco.

Ansco and Agfa-Ansco produced large numbers of cameras, many of which were inexpensive, consumer-grade “snapshot” cameras, while some were of good quality. Many of the early cameras manufactured by the parent Ansco company used larger film sizes that are now unavailable, and should be considered strictly as display cameras. However, many more, such as the Ansco Isolette and Speedex cameras, were produced by Agfa, and the company also rebranded many cameras made by Chinon, Ricoh, and Minolta. The Ansco Speedexes are identical to the Agfa Isolettes.
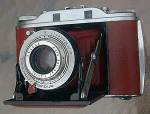
Ansco Speedex Special R

Ansco Speedex Special R.

As candidates for fine art cameras using 120 roll film, Agfa-Ansco’s contenders out of its many products are the Isolettes (and their Ansco versions) in 6×6 cm and the higher-end Record cameras in 6×9 cm. Note that the cheaper models lacked slow shutter speeds, and should be avoided. Some later models had rangefinders and light meters; these are desirable options if in working condition.

BALDA:

Founded in 1908 by Max Baldeweg, Balda-Werk was one of the many successful camera companies in Dresden in the early 1900s. It made considerable numbers of folding cameras, some of which were sold to other companies. Balda cameras were fitted with a very wide range of lenses, from the low cost self-branded triplets through Meyers and
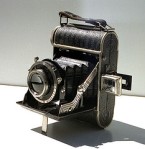
Prewar Baldax 6x4.5 cm

Prewar Baldax 6x4.5 cm

Ludwigs, to the high end Schneider Xenars and Xenons, and Zeiss Tessars and Biotars.

After WW II, Balda, like other Dresden companies, was nationalized under Russian control, and its founder fled to West Germany to start anew. Max Baldeweg set up a new company, also called Balda (Balda Kamera-Werk), this time based in Bünde, West Germany. This company produced a series of 35mm and medium-format rollfilm cameras, some of them being sold by Porst under the Hapo brand. The name of the East German company was changed to Belca-Werk in 1951 after considerable litigation; it continued to produce folding cameras, and was absorbed into the east German photo manufacturing conglomerate VEB Kamera-Werke Niedersiedlitz in 1956.

The original factory of Balda-Werk Dresden’s 120 roll film cameras included the Balda and Baldaxette in 6×4.5 and 6×6 cm, and the Baldafix, Juwella, Pontina (also sold as the Hapo 10 and
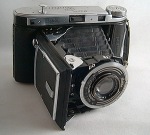
Balda Super Pontura

Balda Super Pontura

Hapo 45) and Super Pontura in 6×9 cm. The East German Belca plant manufactured the Belfoca in 6×9 cm format, and Balda Bunde produced the Baldi 29, Baldix, Mess-Baldix (Hapo 66e), Balda, and Super Baldax. All of the latter were 6×6 cm format.

The various Baldax cameras were well constructed and fitted with quality lenses and shutters. As such, they were extremely popular in pre- and post-war Europe. The only inexpensive cameras in the Balda line were the Juwellas, simple 6×9 cm self-erecting cameras with metal frame viewfinders and lenses of modest quality; they are not suitable for high definition work.

The prewar Baldax was made throughout the 1930s in three main variants: a 6×4.5 cm small model for #00 shutter size, a 6×4.5 cm large model for #0 shutter size and a 6×6 cm model (#0 size). All the Baldax cameras had solidly built diagonal struts, with a typical shape, larger at the base. Some had a folding optical finder and others had a tubular optical finder. The Super Baldax cameras were higher-grade versions of the parent cameras with coupled rangefinders.

The Baldix was similar to the 6×6 cm Baldax but lacked the frame counter. The Mess-Baldix was an improved variant of the 6×6 cm Baldix. Its optical viewfinder included an uncoupled rangefinder. It was available with an f/3.5 Enna Ennagon, f/2.9 Isco Westar or f/4.5 Balda Baltar.

The Pontina cameras, first produced in 1936-37, were rollfilm cameras with provision for both 6×4.5 and 6×9 cm exposures. They were available with a variety of quality lenses and optical viewfinders.

The Super Pontura is now rare, but was the top of Balda’s line of folding cameras designed for the demanding photographer. It featured a coupled rangefinder with parallax correction and a variety of lenses, including a 105mm Zeiss Tessar in a Compur-Rapid shutter.

ENSIGN:

With the exception of photo historians and camera collectors, Ensign cameras are almost unknown in the United States and Canada. I must admit, however, that I have a soft spot in my heart for these delightful little machines, and would heartily endorse several models for fine art work.

In 1834, George Houghton and Antoine Claudet partnered to found a glass company in London, under the name Claudet & Houghton, becoming George Houghton & Sons in 1892. The company’s headquarters were called Ensign House in 1901, and the company began producing roll film under the Ensign

The Ensign Logo

The Ensign Logo

brand in 1903. In 1904, the company absorbed Holmes (the maker of the famed cameras), and three other companies (including A. C. Jackson, manufacturer of the Ilex cameras) to form Houghtons Ltd., continuing production of the Sanderson cameras until 1939. By 1908, the factory in Walthamstow was the largest camera factory in Britain.

In 1915, Houghtons Ltd. came into a partnership with W. Butcher & Sons Ltd, founding the joint venture Houghton-Butcher Manufacturing Co., Ltd. to share the manufacturing facilities. The two trading companies finally merged on January 1st, 1926 to form Houghton-Butcher (Great-Britain) Ltd., which was renamed Ensign Ltd. in 1930.
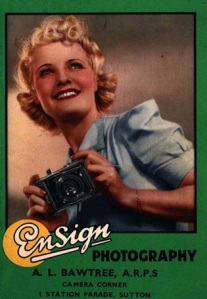
Ensign Catalog Page 1939

Ensign Catalog Page 1939

The headquarters of the trading company, Ensign Ltd., were destroyed by an air raid on the night of September 24, 1940. In 1945, the manufacturing company, Houghton-Butcher Manufacturing Co., joined with Elliott & Sons Ltd. (maker of the film brand “Barnet”) to become Barnet Ensign Ltd. In 1948 Ross and Barnet Ensign were merged to Barnet Ensign Ross Ltd., which was finally renamed Ross-Ensign Ltd. in 1954.

The company was remarkable for two reasons: First, for producing “… high-quality cameras … which can be considered to be superior in finish, and at least equal in performance, to the finest similar equipment produced in Germany up to that time… (S. Marriott, http://www.marriottworld.com/pieces/pieces29.htm). And secondly, for having the bone-headed stupidity to completely ignore the oncoming tidal wave of 35mm, and never even attempt to produce a viable 35mm camera! Consequently, like the passenger pigeon and the Siberian wolf, by the late 1950s this fine company had quietly faded away, with its assets auctioned off at bargain-basement prices.

As the waters have receded, however, some fine pieces of photographic equipment have been left behind on the shore. Of the many Houghton cameras, I would suggest that the reader give serious consideration to the Ensign Selfix series. These have been aptly described by Stephanie Marriott in the reference cited above; some of her comments are summarized below.

The Ensign Selfix 820 was described in a contemporary catalogue as “…Probably the finest roll-film camera, designed successfully to beat all the German competition both in optical and mechanical performance…” The camera body is die-cast metal covered in black morocco leather. The top of
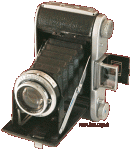
Ensign Selfix 820

Ensign Selfix 820

the body is finished in satin chrome, and the folding Albada viewfinder is located in the center of the top plate. A 105 mm.f/3.8 Ross Xpres lens is mounted in an Epsilon eight speed shutter. The cable-release socket is standard, but the flash sync socket is unique to the Ensign line, and the special Ensign connectors are virtually unobtainable. The Selfix 8/20 takes either 8 or 12 exposures on 120 roll film. Folding masks in the back of the camera allow either format to be selected and the viewfinder has markings for both. Given the propensity for drop-in masks to be lost during the forty-some years since roll film cameras were manufactured, this is a highly desirable feature.

The Ensign Selfix 820 Special is an 820 with a different top-plate assembly, which includes an uncoupled rangefinder and a nonfolding optical viewfinder. The viewfinder has a sliding mask for 6×6 cm. format. An accessory shoe is located on the top of the rangefinder. The Epsilon shutter fitted to the 820 Special usually has a standard 3 mm coaxial connection for flash.

The Ensign Selfix 16-20 (later called the Model II), yielding 16 pictures in 6×4.5 cm format on 120 film, was probably the closest Ensign ever got to producing a “miniature” camera in the post-war period. The design of the 16/20 follows the principles of the 8/20, but the top plate and the Albada viewfinder are combined in a streamlined shape. The Epsilon shutter is
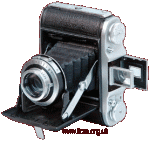
Ensign Selfix 16-20

Ensign Selfix 16-20

smaller and has a top speed of 1/300 sec. The lens is a Ross Xpres f/3.5 75 mm. One interesting feature is that the body release incorporates a blunt pin that presses into the user’s finger if one attempts to take a picture without advancing the film.

The Ensign Selfix 12-20 takes 12 6×6 cm images on 120 film. The design is similar to the 16-20, and the 12-20 uses the same lens and shutter as the 16/20. The shutter release and the camera front release are two chromium plated, tear-drop shaped buttons at the front of the top plate.

Some models of the Selfix cameras were equipped with the Ensar f/6.3 75mm lens. This is an extremely respectable lens and produces very sharp images. However, be aware that some of the cheaper models lacked slow shutter speeds and should be avoided.

FRANKA:

In 1909, Franz Vyskocil and his wife moved their small camera shop and factory from Stuttgart to Bayreuth in Bavaria. After several transitions, the factory received its final name, Franka-Kamerawerk. The company produced plate cameras until 1930, when roll film camera production began. In 1960, the company was purchased by Wirgin. Franka produced many models of 120 format folding roll film cameras, as well as still cameras in 16mm and 35mm format, until production ceased in 1966. Models to consider are the many Franka Solida models produced in 6×4.5 and 6×6 cm, some of which had rangefinders, and the 6×9 cm Rolfix models.

Rolfix camera production started in the early 1930s and continued into the
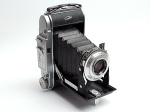
Rolfix II with f/4.5 Radionar

mid 1950s. The prewar models had flip-up optical viewfinders, while postwar models had enclosed viewfinders, and, in the case of the Rolfix IIE, an uncoupled rangefinder. Lenses were commonly an f/3.5 105 mm Rodenstock Trinar or f/4.5 105 mm Schneider Radionar in a Prontor or Compur-Rapid Shutter. Later models had provision for 4.5×6 and 6×6 cm formats with drop-in masks.

The Trinars and Radionars are both three element lenses (triplets) and have differing comments on their optical quality. Many photographers assume that a four element lens such as a Tessar is automatically sharper than a triplet and, as I have mentioned above, in actual practice this is not always true. Comments on photography discussion boards (photo.net is very useful in this area) suggest that prewar versions of these lenses can be soft at the edges at large apertures unless stopped down to f/11-f/22. Other comments suggest that “…triplets are fine lens, especially post war types which are coated and have the new Lanthanium glass…” and “…the Trinar is a very good lens. It is the only three element I continue to use in 105mm focal length 6x9mm format. I have a coated f2.9 version that seems every bit as sharp as my uncoated Xenar…” Both the Trinar and Radionar were fitted to these cameras in an f/2.9 version, and the availablility of these faster lenses may be a factor in favour of choosing a Franka camera.

The Solida family tree, oddly enough, had two branches: the Vertical Solidas, manufactured from the mid 1930s until the early 1960s, primarily for 6×6 cm with a few early 4.5×6 cm models, and the Horizontal Solidas,
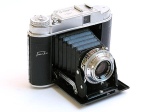
Horizontal Franka Solida II with f/3.5 80mm Xenar

Isolette-style folders for 6×6 cm format with a few models having provision for the bizarre format of 4×4 cm. The Horizontal Solidas were produced from1953 through the early 1960s. After the war, the horizontal models became the Solida I, II, Junior and Record, while the vertical models became the Solida III series. In the horizontal series, the Solida IIs are preferable, as they are more sophisticated than the Solida I models, and the Junior and Record Solida cameras are basic models which should be avoided. A manual for the Franka Solida cameras can be downloaded at Mike Butkus’ web site at http://www.butkus.org/chinon/solida/solida_6x6_i_ii.htm

The vertical model Solida cameras came with Radionar or Trinar f/2.9 80mm
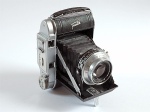
Verical Franka Solida IIIE with f/2.9 Radionar

lenses in one of the several models of Prontor or Compur shutters; occasional models can be found with Xenar lenses. Frankar, Westar, or Cassar lenses were less expensive, and probably lower quality, options. All had body shutter releases, and some models had engraved top depth of field scales. The III E models had an uncoupled rangefinder. Later Solida III L models were equipped with selenium light meters; the III EL cameras had both. The meter may or may not be an asset, depending on whether it is working and accurate. Overall, when in good condition, these are compact and very functional 6×6 cm cameras. Jurgen Krenkel comments of the Solida IIIE “…I’ve always found these to be excellent cameras and excellent optics…”

The horizontal model Solida II cameras came with similar Radionar/Trinar lens and shutter combinations. As with the vertical models, there were some additional lens types used, including the f/3.5 Isconar, Ennagon, and Westar lenses and f/4.5 and f/3.5 Frankar lenses. Franka purchased its lower-end lenses from a variety of manufacturers. Isco, founded in Gottingen in 1936, is still in existence today and specializes in cinema projection lenses. It has made lenses for a variety of camera manufacturers, and produced for Franka the Isconar and Westar lenses. Frankar lenses were made by Steiner-Optik GmbH of Bayreuth, a well-known manufacturer of binoculars; Steiner also manufactured camera lenses which were of reasonable quality. In accordance with the nomenclature of the vertical series, cameras designated E had rangefinders and those designated L had selenium light meters.

KODAK:

Kodak cameras will be discussed under their own heading.

VOIGTLANDER:

Founded by Johann Christoph Voigtländer in Vienna in 1756 , Voigtlander was the first factory for optical instruments and precision mechanics in
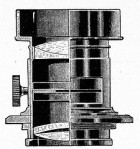
The Petzval Portrait Lens

The Petzval Portrait Lens

Austria. In 1840, after the invention of the photographic process by Fox Talbot and Louis Daguerre, Voigtlander produced the first camera lens designed according to mathematical principles. The Petzval portrait lens, created by Jozef Petzval, was, despite its distinct peripheral aberrations, one of the great lenses of the late 1800s, and has enjoyed a resurgence among present-day portrait photographers who strive for a “classic” look.

After a long history of producing quality cameras and lenses, Voigtlander became a part of Zeiss in 1965. In 1972 Zeiss/Voigtländer stopped producing cameras, and a year later Zeiss sold Voigtländer to Rollei. On the collapse of Rollei in 1982, the Voigtlander company was purchased by Plusfoto GmbH & Company, a buying cooperative of German photo dealers. Plusfoto sold Voigtlander in 1997 to Ringfoto GmbH & Company, a similar cooperative, who relaunched the company. In the late 1990s, Cosina licensed the rights to use the Voigtländer name and the names of Voigtländer lenses for its own products, introducing the Bessa series of 35mm rangefinder cameras. McKeown reports that the Cosina-produced Heliar lenses are of excellent quality.

Over the years when it was an independent manufacturer of cameras and lenses, Voigtlander has produced many fine cameras, as well as some that were cheaper and aimed strictly at the consumer market. In the category of quality folding cameras taking 120 film, the two series to consider are the Bessa 6×9 cm cameras and the 6×6 cm Perkeos.

There were many Bessas, starting in the 1920s and extending through the 1950s. One excellent model is the Bessa I, with the option of taking eight 6×9
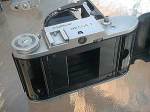
Rear of Bessa I with Mask

Rear of Bessa I with Mask

cm exposures or 16 6×4.5 cm exposures with a removable mask that drops into the focal plane. Unfortunately, like most removable pieces on old cameras, it is usually missing. The viewfinder is integrated into the top housing and has parallax correction by a series of rotating masks. The lens is either a three element f/4.5 105mm Vaskar or a four element, Tessar-type f/3.5 105mm Color-Skopar. Although simple, the Vaskar is reported to produce excellent images. The shutters are Prontors or Compur-Rapids with speeds from 1 to 1/250 second. The Bessa I cameras retail at $35-100.

The Bessa II is of top quality and has excellent optics, being fitted with either
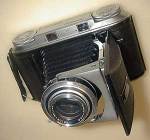
Bessa  II with Heliar Lens

Bessa II with Heliar Lens

a Colour-Skopar, a five-element f/3.5 105mm Colour-Heliar, or, very rarely, a six element Apo-Lanthar. Focusing is unusual, being accomplished with a knurled wheel on the top left of the body that moves the entire front lens/shutter combination in and out. The viewfinder and rangefinder are combined in the top housing. The shutter is a Compur-Rapid or Synchro-Compur with a top speed or 1/400 or 1/500 second, respectively.

The main disadvantage of the Bessa II is that it is very expensive: prices for a Bessa II with a Colour-Skopar range from $300 to $500; with a Colour-Heliar, from $500 to $800; and with the Apo-Lanthar, from $2400 to $2800. My philosophy when faced with prices of this sort is that one should buy a lens that gives one the best possible images; this may or may not be an expensive lens. Past this point, spending large quantities of money is overkill. Superb work can be done readily with cameras costing under $100, and many of the images in this blog were done with Kodak cameras costing under $25.

The 6×6 cm Perkeo, a well made but fairly basic camera, came in three
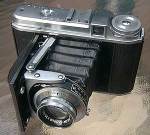
Perkeo II with Colour Skopar

Perkeo II with Colour Skopar

models: I, II and IIIe, all with a viewfinder enclosed in the top housing. The Perkeo I indicates whether the shutter has been cocked and has double exposure prevention, while the II adds a frame counter. The IIIe, which was produced only in small numbers, possesses an uncoupled rangefinder but lacks the frame counter. Lenses are either the Vaskar or a 80mm f/3.5 Colour-Skopar, mounted in Prontor or Compur shutters.

Frank Mechelhoff’s site has some excellent comments and complete diagrams of a large series of historical Voigtlander lenses.

WELTA:

Welta, founded in 1914 as Weeka-Kamera-Werk, was one of the many camera manufacturing companies in the Dresden area in the early twentieth century. Initially producing plate cameras, the company changed its name to Welta-Kamera-Werk and introduced roll film cameras circa 1920. 35mm cameras were introduced in 1935. The company became state run after World War II, and was finally absorbed into VEB Pentacon in 1964.

Welta produced two roll film cameras that should be considered: the Weltur,
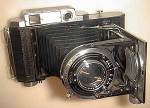
Welta Weltur 6x9 cm

Welta Weltur 6x9 cm

available in 6×9, 6×6, and 6×4.5 cm formats, and the Weltax, produced in 6×6 and 6×4.5 cm. The Weltur, produced from 1935 to 1940, had a rangefinder coupled to a focusing system that moved the whole front lens assembly. Earlier models had shutter-mounted releases, while later editions had releases mounted on the body. The Welturs came equipped with a variety of lenses, including a Cassar, Trinar, Radionar, Tessar, Trioplan or Xenar, mounted in Compur or Compur-Rapid shutter. A manual for the Weltur (in German) is available at http://www.scribd.com/doc/17619947/Manual-for-the-Weltax-camera.

The Weltax cameras were basically Welturs with body releases but without
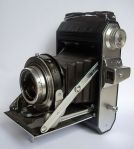
Welta Weltax

Welta Weltax

the rangefinder. A top viewfinder had parallax correction. Like the Weltur, format was changed by means of drop-in masks which are often missing. Both the Weltur and the Weltax are extremely well made, and it is reported that images made even with the simpler Triotar lens can be enlarged to 24×36 in. The Weltax was produced both before and after World War II; there are some reports that claim that the postwar units were of lesser quality.

ZEISS:

A giant and major innovator among optical companies, the original Zeiss

Market Square, Jena

Market Square, Jena

company, Carl Zeiss Jena, was founded in 1846 in the university city of Jena, in the province of Thuringia in eastern Germany. Originally a manufacturer of microscopes and scientific instruments, the company founded the Schlott Glass Works to develop specialized optical glasses for microscopes. Recognizing the potential of these new glasses for photographic lenses, the company hired Dr. Paul Rudolph, who designed the famous Anastigmat, Planar, and Tessar lenses. Zeiss entered the camera manufacturing business in 1902 with the acquisition of the Palmos A.G. Company.

In 1909, Palmos was transferred to the ICA group, and the Jena company returned to lens manufacture. In 1926, four camera manufacturers, ICA, Contessa-Nettel, Ernemann, and Goerz, merged to form Zeiss Ikon, which became one of the major photographic manufacturers in Dresden, with plants in Stuttgart and Berlin. After World War II and the partition of Germany, both Jena and Dresden became part of the Soviet-run eastern bloc. Zeiss Jena was assisted by the US army to relocate to the Contessa manufacturing facility in Stuttgart, where the new headquarters were set up. Camera and lens production continued through the merger with Voigtlander (see above) until camera production ceased in1972.

The East German component, VEB Zeiss Ikon Dresden, restarted production in 1945, but was forced to interrupt when the Russian Army took most of the existing Zeiss factory equipment, tooling and remaining personnel back to the Soviet Union to form the Kiev camera works as reparation for the destruction of Russian camera factories. Camera production resumed with manufacture of the famed Contax line. As a result of trademark disputes with Zeiss Ikon AG, the company was renamed VEB Kinowerke Dresden in 1958, and later formed a major part of the photographic conglomerate Pentacon.

The fall of the Berlin Wall and the reunification of Germany in 1990 had vastly different implications for the Eastern and Western divisions of Zeiss. The West German corporation was efficient and technologically advanced; its East German counterpart was nearly bankrupt, grossly inefficient, technically backward, and had a bloated staff of approximately 70,000. Sadly, only a portion of the staff and facilities were acquired by Carl Zeiss of West Germany. The history of post-reunification Zeiss is complex (for example, cameras named “Contax” had been produced on both sides of the Iron Curtain) and has been well documented on Company Seven’s web site at http://www.company7.com/zeiss/history.html.

Zeiss produced a number of important 120 roll film cameras suitable for fine art work; models that should be considered include the entry-level Nettar cameras, together with the Ikontas and rangefinder-equipped Super Ikontas.

The Nettars, designed as a low cost alternative to the more expensive Ikonta
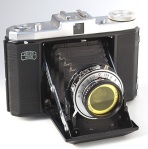
Zeiss Nettar 517 6x6 cm

Zeiss Nettar 517 6x6 cm

series, were one of the most commercially successful of all Zeiss Ikon cameras. Although simple and somewhat more lightly built than the Ikontas, they are worthy of consideration. Nettar cameras were available in 6×9, 6×6, and 6×4.5 cm formats, and were equipped with either Tessar, Nettar, or Novar lenses. The Tessar is preferred, although the Nettar and Novar lenses, both of which are three element lenses, have been reported to produce respectable results. There are some reports that suggest that both of these triplets are best when used stopped down. Prontor or Compur shutters are preferred; some models came with the cheaper Vario, Klio or Derval shutters. Viewfinders are of simple metal frame design except for those models with a viewfinder incorporated into the top plate assembly.

The Ikontas and Super Ikontas (equipped with coupled rangefinders) were
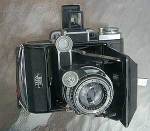
Zeiss Super Ikonta Model 531 6x9 cm

Zeiss Super Ikonta Model 531 6x9 cm

Zeiss Ikon’s top line of roll film cameras. Starting in the 1930s, a bewildering variety of Ikonta-series cameras were produced, with an equally bewildering system of nomenclature. A well organized and lucid account of the evolution of the Ikonta line and its model numbers can be found on Pacific Rim Camera’s Zeiss page (see below). The majority came equipped with Tessar lenses (or less frequently, a Schneider Xenar) in Prontor or Compur shutters, with a Novar lens in a Derval shutter, or a Triotar in a Klio shutter as a lower cost alternative. Prewar lenses were typically uncoated, while units produced after the war more commonly had coated lenses. Some later Super Ikontas were fitted with selenium-cell light meters. There have been some questions raised about the Zeiss Opton Tessar lenses, which should be of excellent quality. However, there have been claims on photography blogs that some of the postwar Optons were assembled by relatively unskilled staff and that the lens elements may not retain their position.

Many of the Ikontas came with simple metal frame viewfinders, while the
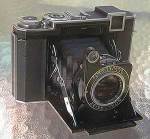
Zeiss Super Ikonta B Model 532 6X6 cm

Zeiss Super Ikonta B Model 532 6X6 cm

Super Ikontas had Albada-type optical viewfinders. Later Super Ikontas models had the viewfinder and rangefinder base assembly incorporated into the top plate assembly. With the exception of the Super Ikonta III and IV, the last of the Ikonta line, the Super Ikontas’ typical appearance resulted from their rotating wedge rangefinder, which had the wedge located on an arm attached to the lens standard. All rangefinders were coupled except for the 6×6 cm “Mess-Ikonta” Model 524 6×6 cm, which had an uncoupled rangefinder incorporated into the top plate.

The Ikontas and Super Ikontas are of excellent quality, but it should be noted that they are rather expensive, falling in the range of $150-500. If the shutter needs to be cleaned, the overall cost will be approximately $100 higher. However, for this price, one gains excellent Zeiss optics, a large, high resolution negative, and precise rangefinder focusing.

A useful collection of technical notes and images of a number of classic roll film cameras can be found on A. MacPherson’s “Classic Cameras” web site. Some useful thoughts on lenses can be found on Beedham’s UK eBay Guide. Beedham has some interesting conclusions regarding the value of some simpler lenses versus more established names.

References:

Beedhams. “Choosing Medium Format Lenses – What’s in a Name?” eBay UK Guide. http://reviews.ebay.co.uk/Choosing-medium-format-lenses-what-apos-s-in-a-name_W0QQugidZ10000000000892177

Camerapedia and Wikipedia articles on Agfa, Ansco, Balda, Ensign, Voigtlander, Welta, and Zeiss.

Cohen, Martin C., “Carl Zeiss- A History of a Most Respected Name in Optics”, Online Posting, Company 7 web site, http://www.company7.com/zeiss/history.html.

“Ikonta”, Pacific Rim Camera, http://www.pacificrimcamera.com/pp/zeiss/ikonta/ikonta.htm.

Krenkel, J., “Vintage Folding Cameras”, http://www.certo6.com.

MacPherson, A. “Classic Cameras.” www.amdmacpherson.com/classiccameras.

Mechelhof, Frank. “VOIGTLANDER – Historial Lenses.” http://www.taunusreiter.de/Cameras/Bessa_RF_histo.html

“Super Ikonta”, Pacific Rim Camera, http://www.pacificrimcamera.com/pp/zeiss/sikonta/sikonta.htm.

Young, D., “Medium Format in Your Pocket”, Planet Nikon website, http://www.cleanimages.com/Article-MediumFormatInYourPocket.asp.

Profound thanks to Stephanie Marriott for use of the information on the Marriott web site, and to Darrell Young, Jurgen Krenkel, and the Living Image Camera Museum for the use of images.