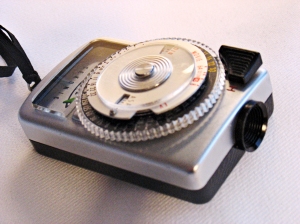
Although the Sunny f/16 rule is enormously helpful, if one is going to do serious photography, one needs a light meter. There are four possible options for obtaining a serviceable meter:
- A new light meter- the most expensive option.
- A used light meter from a photographic dealer. A guaranteed product, often at a reasonable price.
- An older model meter with a CdS sensor, often originally designed around a mercury battery. These can be excellent meters and may often be obtained at a reasonable price on eBay. However, as mercury batteries are no longer obtainable, they need to be recalibrated to use modern batteries; this costs approximately $60 at a good camera repair shop. Wein cells (zinc-air batteries) have been marketed to replace mercury batteries. However, my camera repair guru at Seattle’s Camera Clinic notes that these are basically hearing aid batteries and have a short life span.
- An older, selenium cell-based light meter. These have no batteries, operating entirely on the current produced by the selenium cell. If working, these can be reliable and very serviceable meters, and can ofter be obtained for a few dollars on eBay. Their one drawback is that they are not sensitive at low light levels. The higher end selenium meters are supplied with a booster cell to be used in dim light; this extends the range to some extent.
Although some authors recommend against purchasing older selenium cell meters, I have had good results with meters of this type from reputable manufacturers. Sekonic meters seem to weather the years well. One throws out the occasional meter that is nonfunctional or badly out of calibration, but the older meters are relatively inexpensive and one can afford to dispose of the occasional dud.
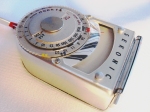
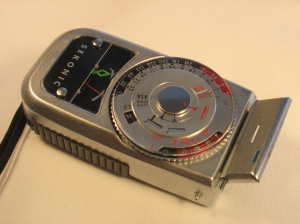
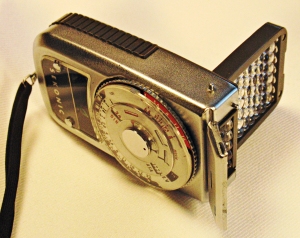
Among the older Sekonic selenium meters, two models stand out. The first is the Sekonic L-8 Leader Deluxe, a compact meter with a detached amplifier cell that plugs into the bottom of the unit. Like most of the selenium meters,
this has a pop-up cover that obscures most of the cell for high light levels; this cover pops open to expose the entire area of the cell for intermediate light levels. For low light levels, the amplifier unit (a large selenium cell) is plugged in. The indicator dial has three colored markers in red, yellow and blue respectively, each representing one of the three different modes. Note that for low light level readings, the amplifier is used in conjunction with the open flip-up cover. This meter is small, fitting nicely into the pocket of a small gadget bag, and extremely simple to use. The manual for this meter is available on Mike Butkus’ Orphan Cameras site.
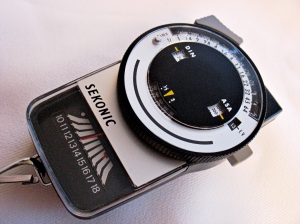
A slightly newer and larger meter is the Sekonic Multi-Leader, which has the
amplifier cell incorporated into the bottom of the meter. Arming the booster cell can be something of a challenge until one discovers that the cell ingeniously releases automatically when the dial is turned to the black indicator. Otherwise, operation of this meter is identical to the L-8 Leader Deluxe.
The cadmium sulfide (CdS) meters are battery operated, utilizing the variation in resistance of the CdS cell at different light levels. As a result, they are capable of responding to low light levels, and their responsive range covers most of the light levels practical for film photography. Among the older Sekonic CdS meters, one of the classic models is the L-248 Multi-Lumi, produced from 1971 to 1992. This meter, whose manual is also available on Mike Butkus’ site, can be used in either incident or reflected light mode, using a frosted plastic hood to cover the CdS cell for incident readings.
A smaller and somewhat simpler CdS meter is the Sekonic Micro-Leader, which lacks the capability for incident light readings.
This meter originally used a PX-13 1.35 volt mercury battery, which is now no longer available. Although the MBR625 Wein cell is advertiSed as a substitute, as noted above, these are hearing aid batteries, and their use is not recommended because of their very limited life span. Various adapters are also advertised, but it is best to expend approximately $60 and have the meter recalibrated to use a modern battery.
A wide variety of other classic meters are available, and the reader is advised to consult Karen Nakamura’s Photoethnography.com web site for a discussion of classic meters from Gossen, Weston, and other manufacturers. Manuals for many of these meters are available on Mike Butkus’ web site.
An excellent treatise on the subject of exposure and exposure values is available on John Lind’s Science of Photography site, cited below. Ace Camera’s notes on using an 18% gray card are also helpful.
An excellent discussion of early light metering systems is available on the Early Photography site.
References:
Ace Camera. “How to Use an 18% Gray Card.” http://www.acecam.com/magazine/gray-card.html.
Butkus, M. “Flash and Light Meter Instruction Manuals.” http://www.butkus.org/chinon/flashes_meters.htm
Early Photography. “Exposure Meters.” http://www.earlyphotography.co.uk/site/meters.html.
Lind, John. The Science of Photography: Exposure.” http://johnlind.tripod.com/science/scienceexposure.html.
Nakamura, Karen. “Light Meters for Classic Cameras.” http://www.photoethnography.com/equipment.html
Wikipedia Article: “Light Meter” http://en.wikipedia.org/wiki/Light_meter.
