Midnight on the Sammamish River

Much of the time, it seems that one takes endless pictures without achieving anything that is more than mediocre.  Then one image, often taken without much previsualization or planning, is perfect.  This is one such image.  One night in 1992, I was bicycling at

midnight on the Burke-Gilman Trail along the Sammammish River north of Redmond, Washington.  Mist hung in the still air over the river, and the lights of nearby businesses across the river cast a lacework of light though the thin misty curtains.  I had loaded my 1965 Pentax Spotmatic  with Agfa Optima film, and brought along my 50mm Super-Takumar lens- a vintage lens of superb optical quality.

Fascinated with the play of light, mist and shadow over the river,  I had nothing but a miniature tripod which I strapped to the handlebars of my bicycle, and I guessed at a two minute exposure.  When I went to bracket exposures, I discovered that this was the last frame on the roll.

In this final print, the lights of Redmond create a beautiful dawnlike effect in the east.  The air was still, and the crisp images of the individual grasses attest to both the quality of the Takumar lens and the perfect stillness of the night.  In this case, all the elements came together to create a lovely image.

References:

Rochkind, Marc.  “Marc’s Classic Cameras:  Asahi Pentax Spotmatic- 1964.”  http://basepath.com/Photography/Spotmatic.php.

Wikipedia Article:  “Pentax Spotmatic.”  http://en.wikipedia.org/wiki/Pentax_Spotmatic.

Restoring Vintage Cameras IV: The Model 3A Folding Ansco- The Camera and Its Story

Restore a vintage camera and post it as an online serial? Why not! For $12 I purchased an elegant old lady of photography, a Model 3A Folding Ansco, and will restore it online, posting the process to illustrate each step. This post will describe the camera and explore its story; Part V will describe the restoration.

The Model 3A Name Plate

The 3A Ansco is an elegant camera, with a wooden body covered with lovely pebble-grained Moroccan leather, and metal parts that gleam (or once gleamed, as they are sadly tarnished) with nickel plating. The front standard supports a big, round, black shutter atop a gleaming collection of struts, levers and extendable feet.

The No. 3A Folding Ansco

The Ansco’s proportions are generous, measuring 9 1/2 x 4 3/4 x 2 in (24 x 12 x 5 cm), and she weights in at 2 lb 8 oz – hardly a “Vest Pocket” model, even allowing for how loosely that term was applied in those days. Her size allows her to use Ansco 18A or 18B film, equivalent to Kodak’s No. 122 film, permitting an expansive 3 1/4 x 5 1/2 in negative and qualifying the 3A a a true “Postcard” camera.

For film she probably used Ansco’s Plenachrome or Super Plenachrome, quality films but with not quite the contrast and image quality of the contemporary Kodak and Agfa films. Scott’s Photographica Collection web page has an excellent discussion of Ansco film sizes.

The Model 3A Folding Ansco was produced from 1914 to 1932. Unfortunately, unlike Kodak cameras, information on Ansco cameras’ production runs and model changes is limited, so dating an individual camera is a challenge. Diligent searching reveals no serial number. The last patent date on the stamping inside the back is 1912, so it is possible that this represents one of the early 1914 models.

Ansco Back Cover Inscription

For a consumer-level camera, the degree of sophistication is a pleasant surprise. The front standard incorporates a moderate degree of rise and fall
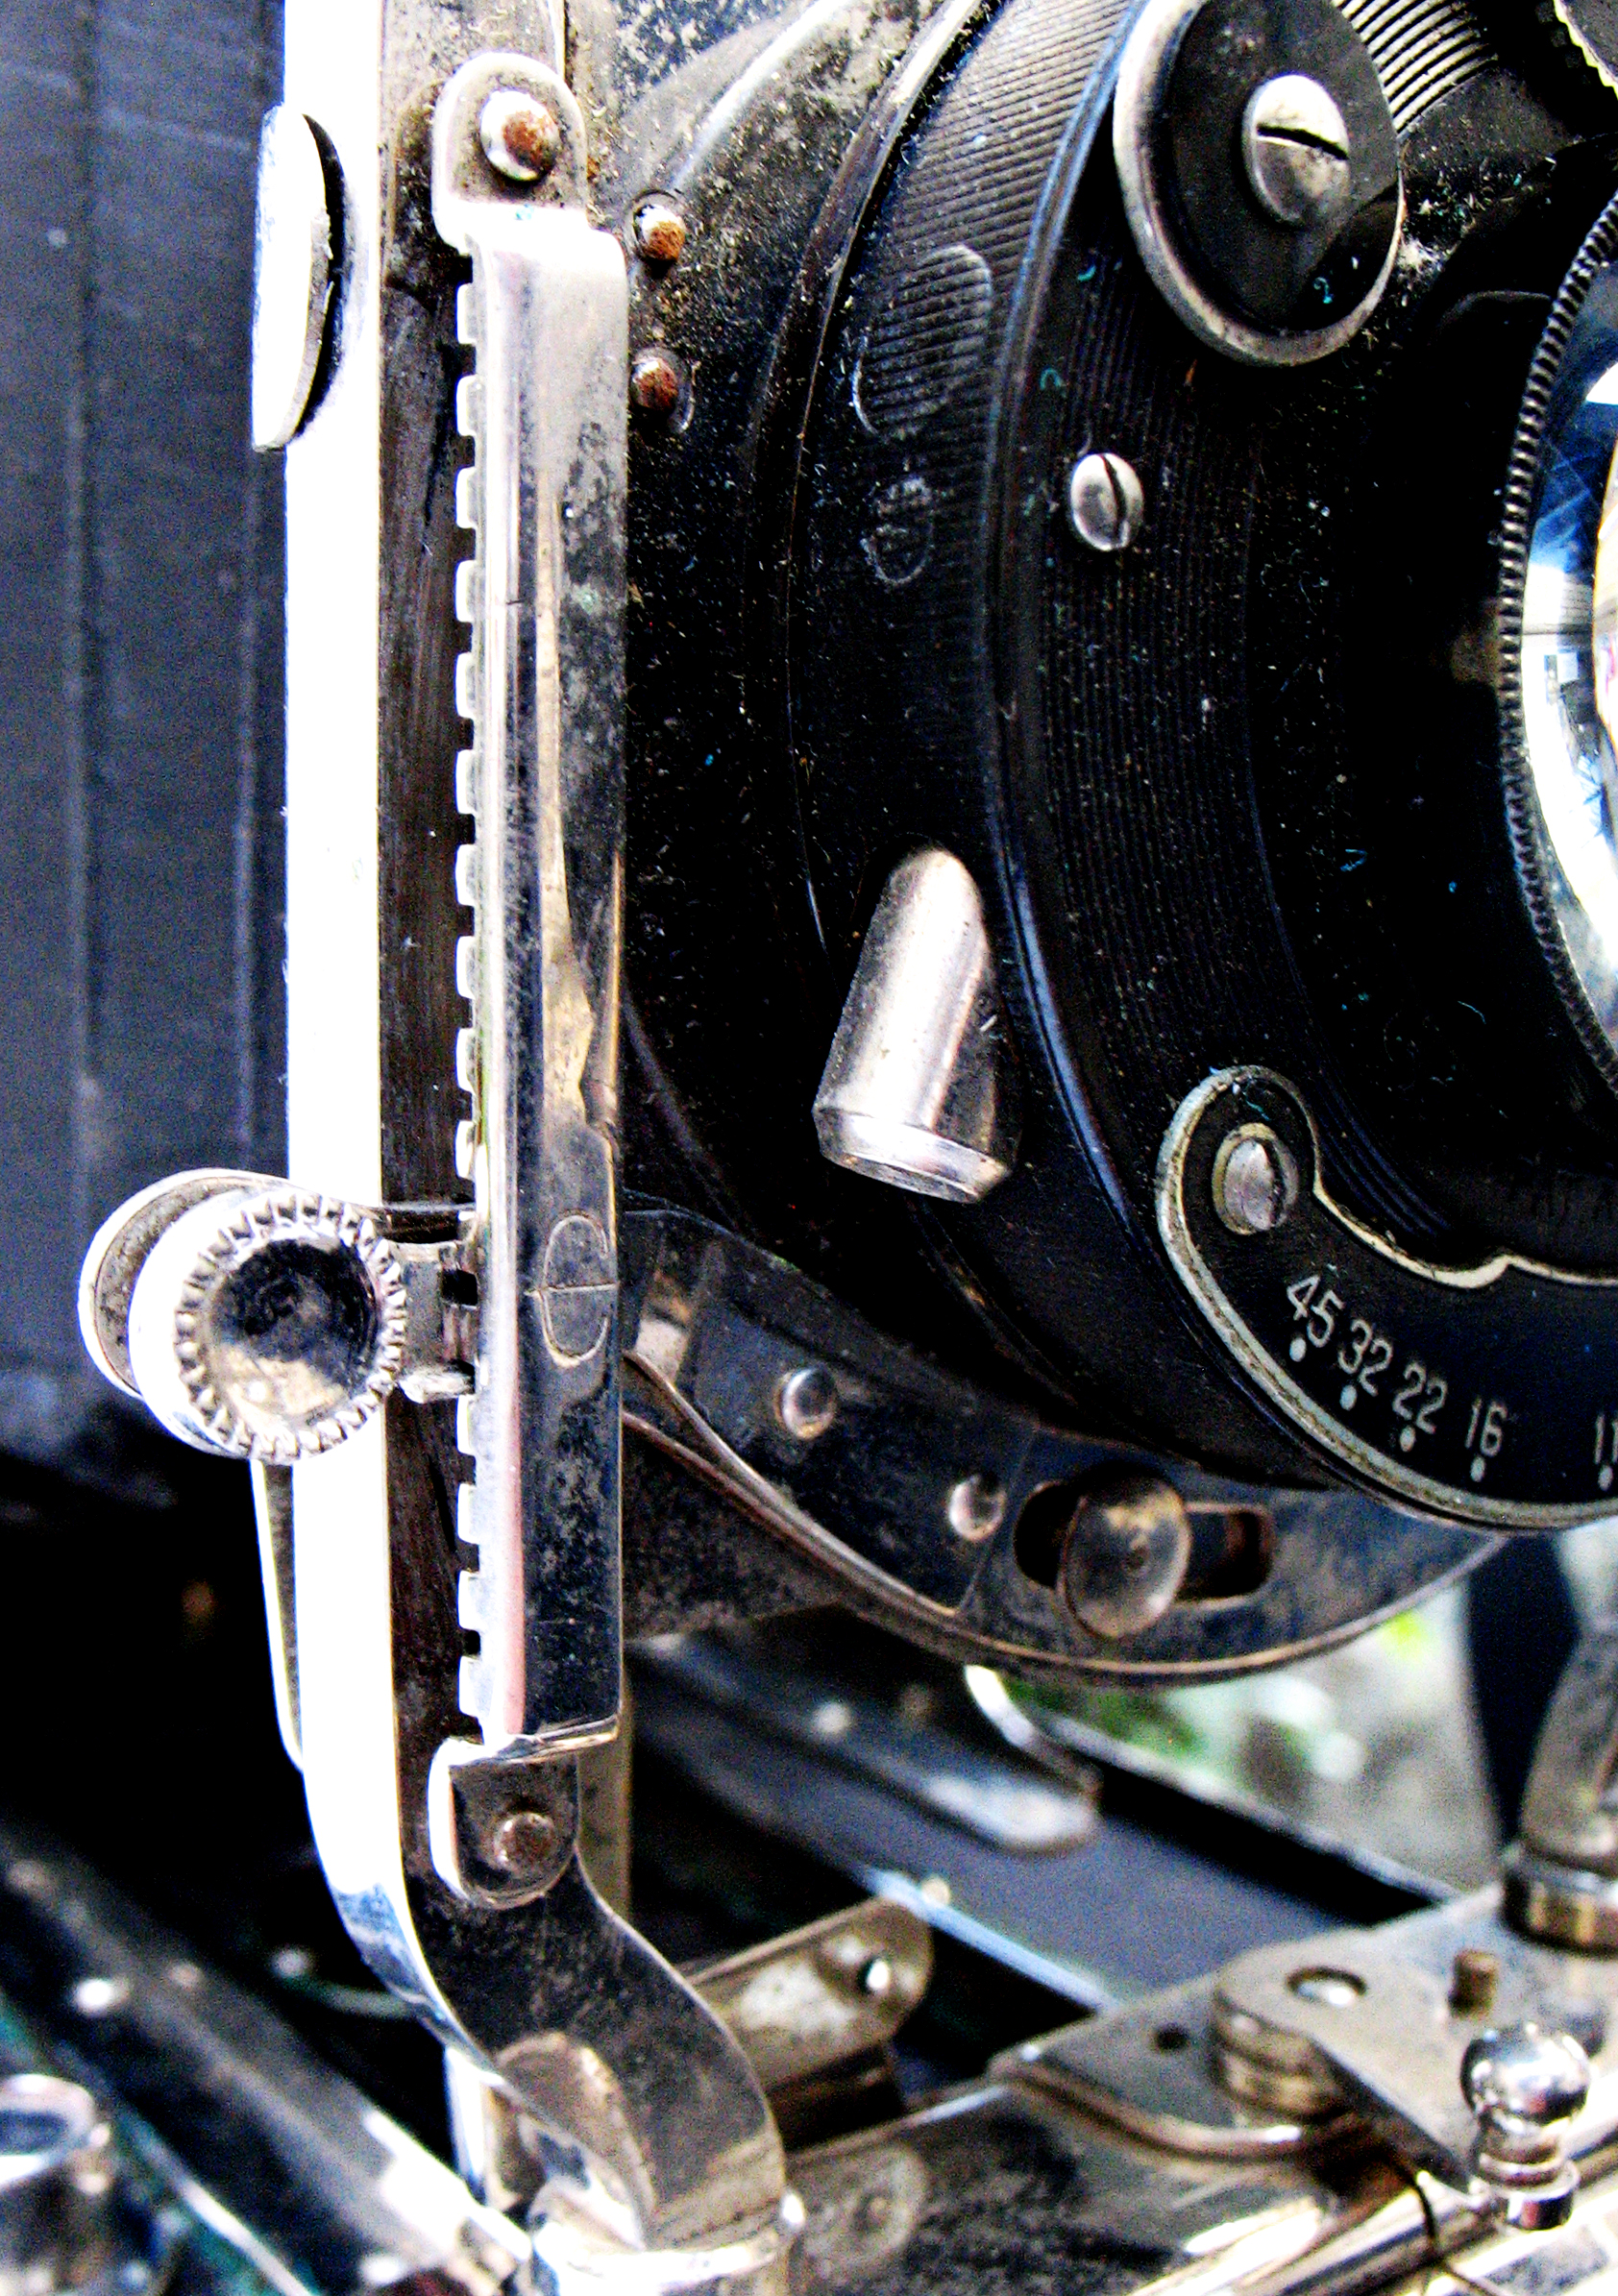
Front Rise Mechanism

for architectural subjects, controlled by a lever with click stops to the left of the lens. Lateral shift can be accomplished by unlocking the small handle directly below the lens and sliding the standard left or right on the front runner mechanism. Complex folding legs extend from the front standard to support the camera on a flat surface in vertical and horizontal orientation. A flip-up cover protects and shades the viewfinder, and the mask framing the image on the viewfinder cleverly rotates on a geared mechanism as the viewfinder is rotated from the vertical to the horizontal position. Focusing is
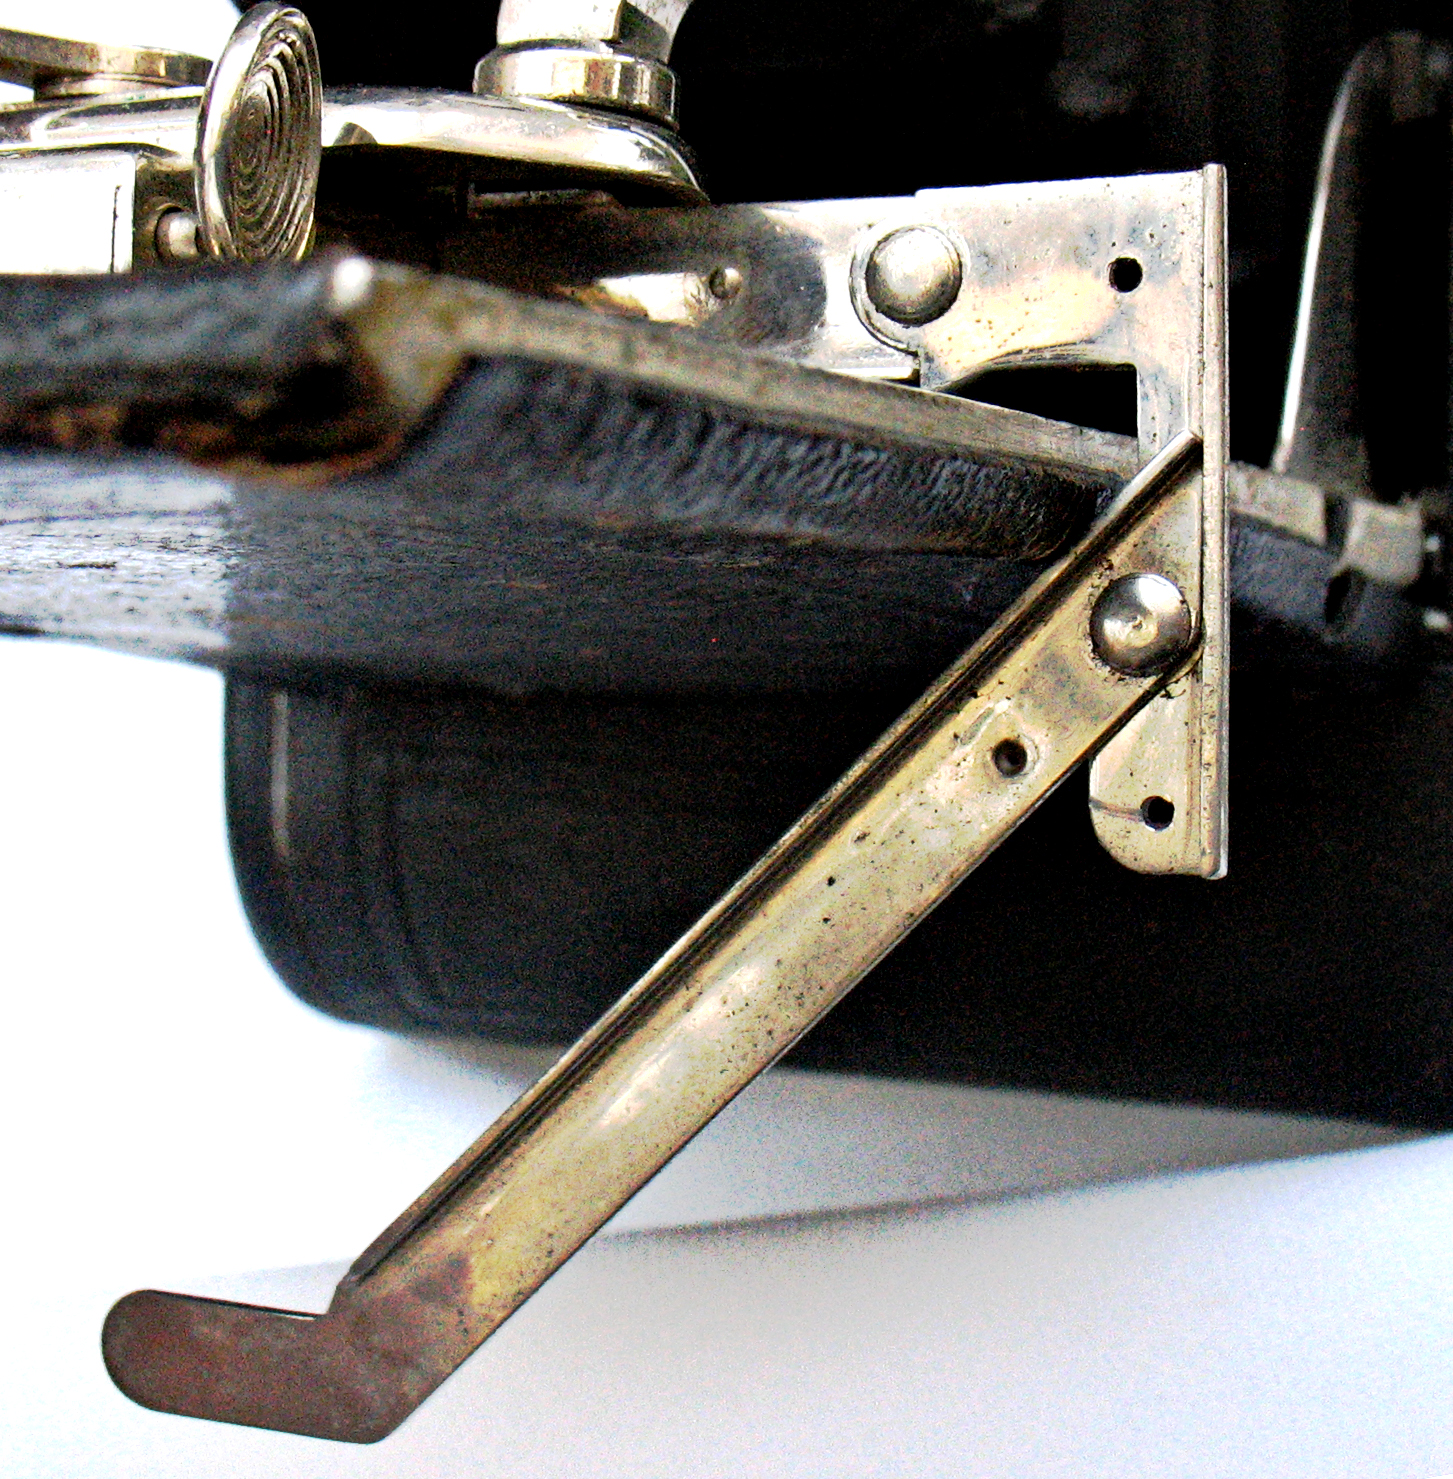
Front Support Foot

accomplished via a lever on the baseplate that is calibrated for both roll film and plates.
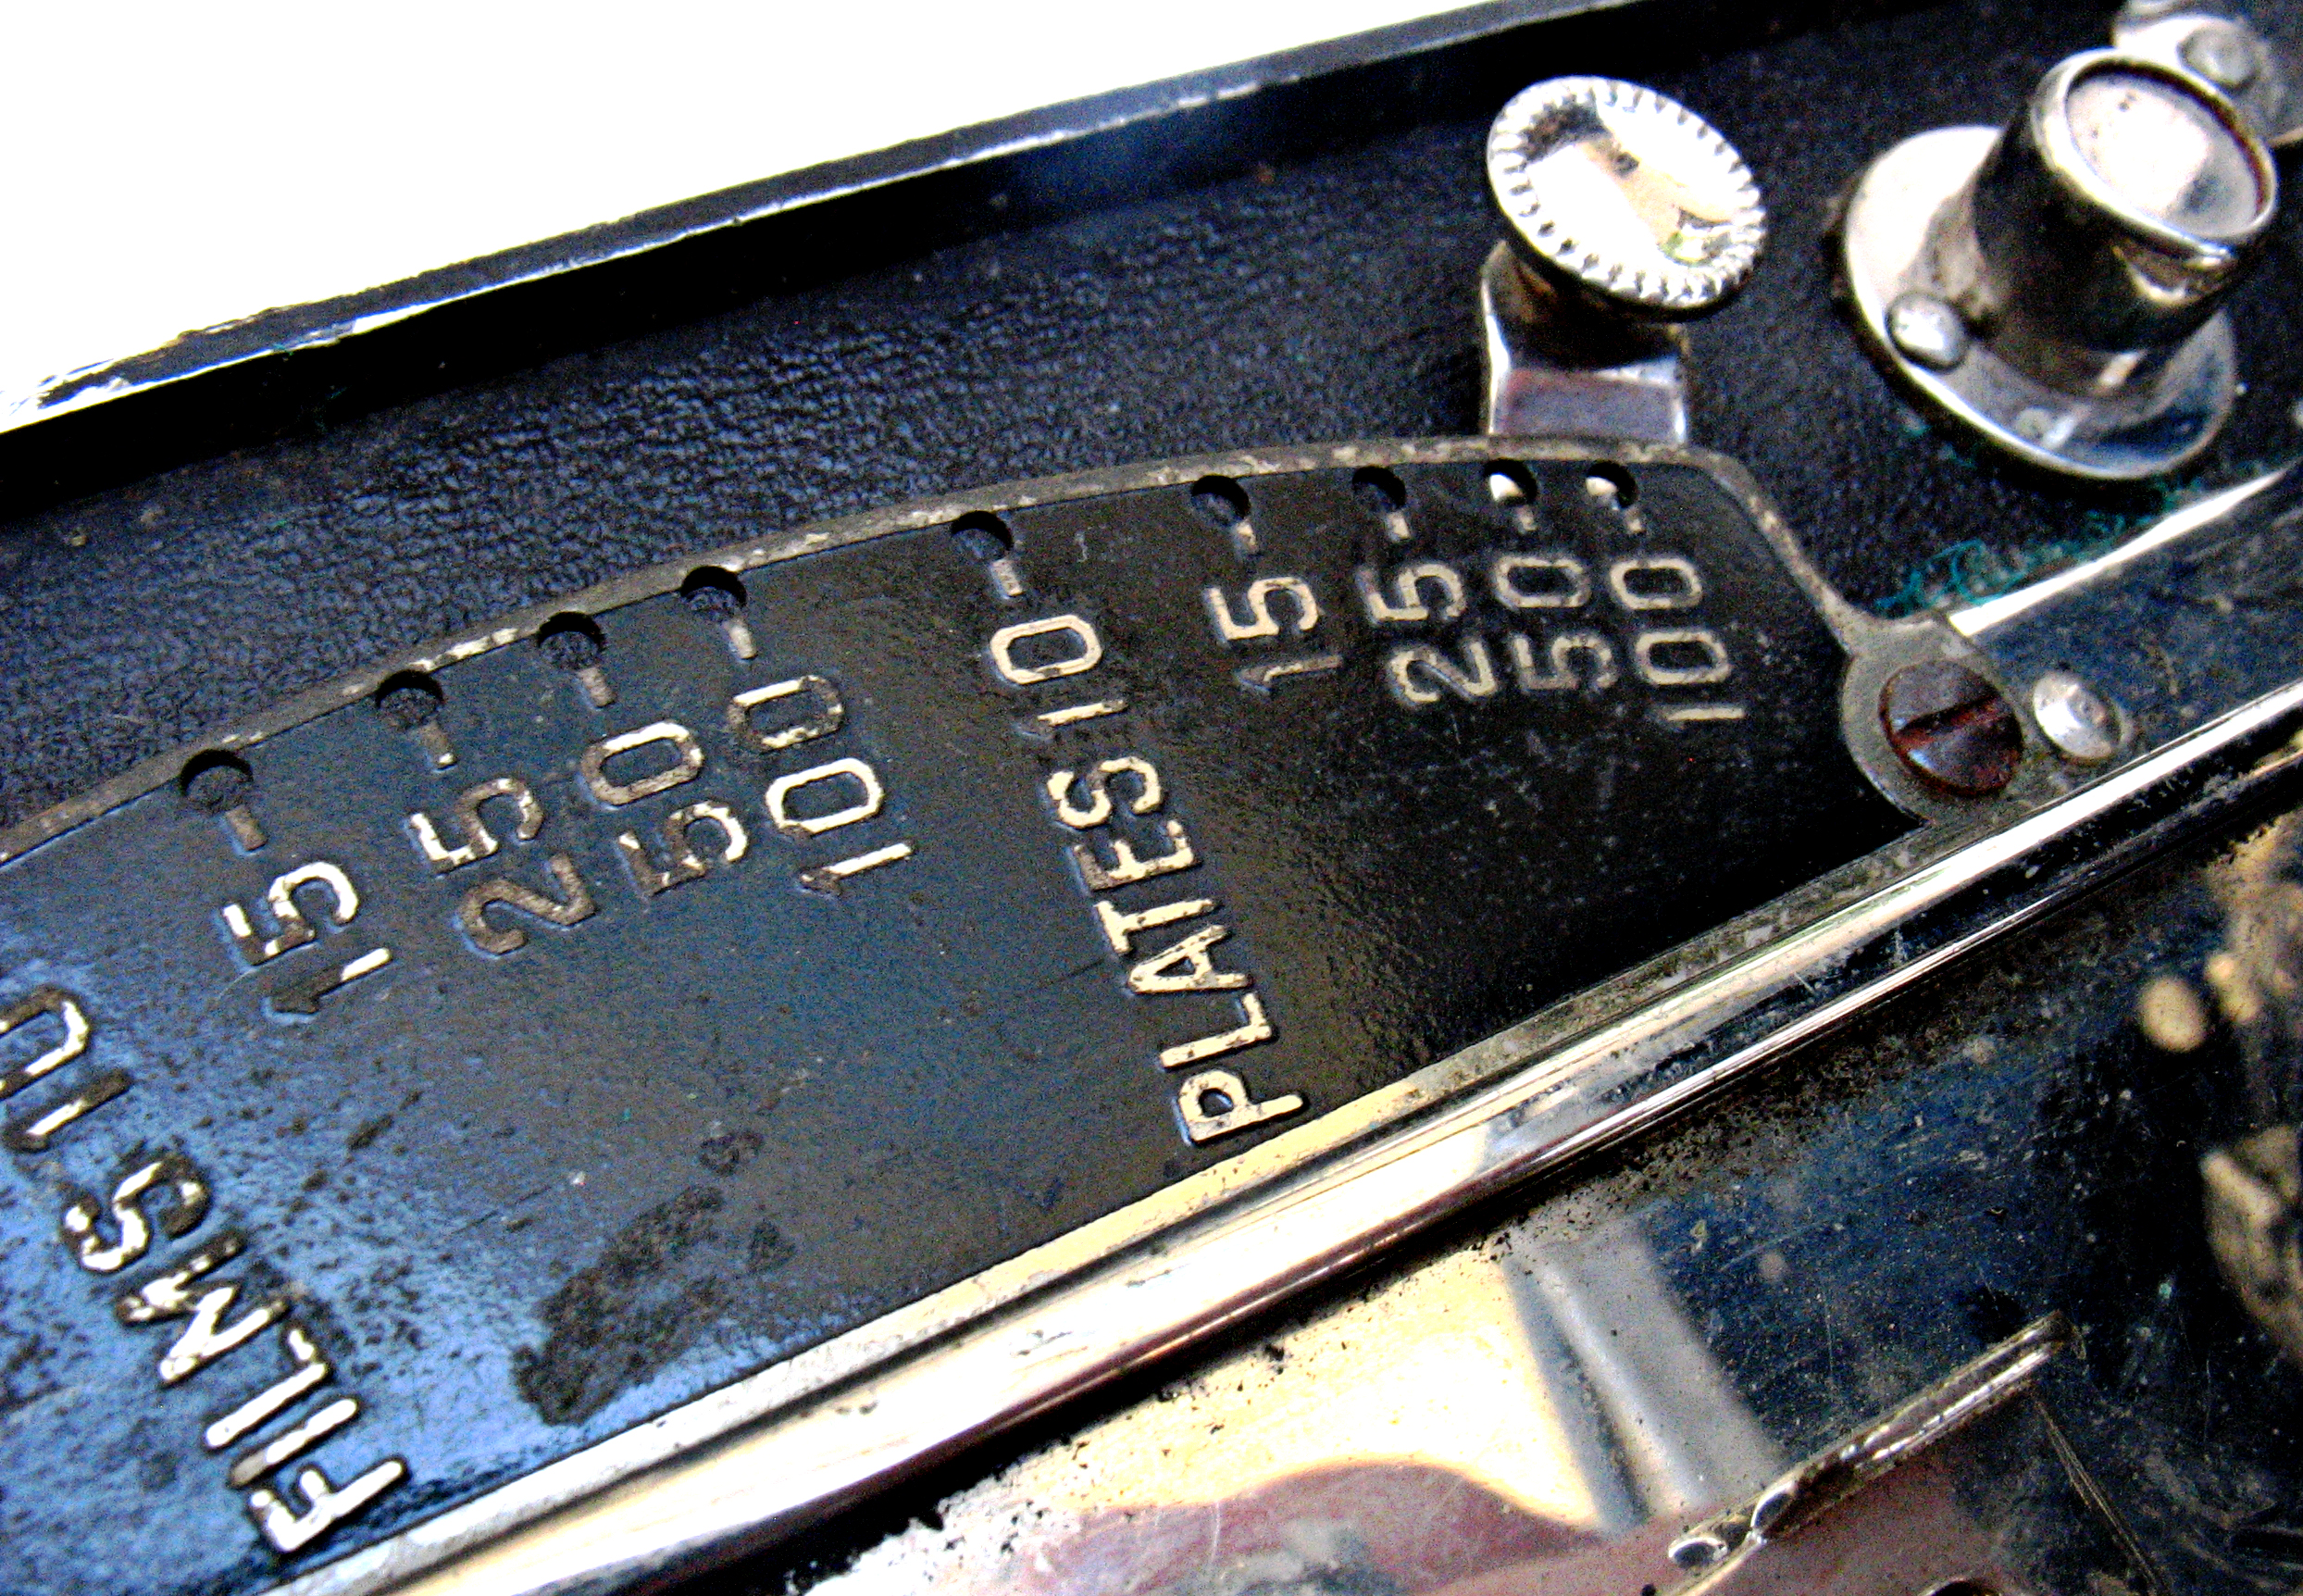
Focusing Mechanism

The 3A Ansco had the option to use a back accepting glass plates or film packs; these are found with the camera only rarely.

The Lens and Shutter:

The lens and shutter on this model are more complex than those usually found on a consumer-level camera, the former being an f/6.3 uncoated
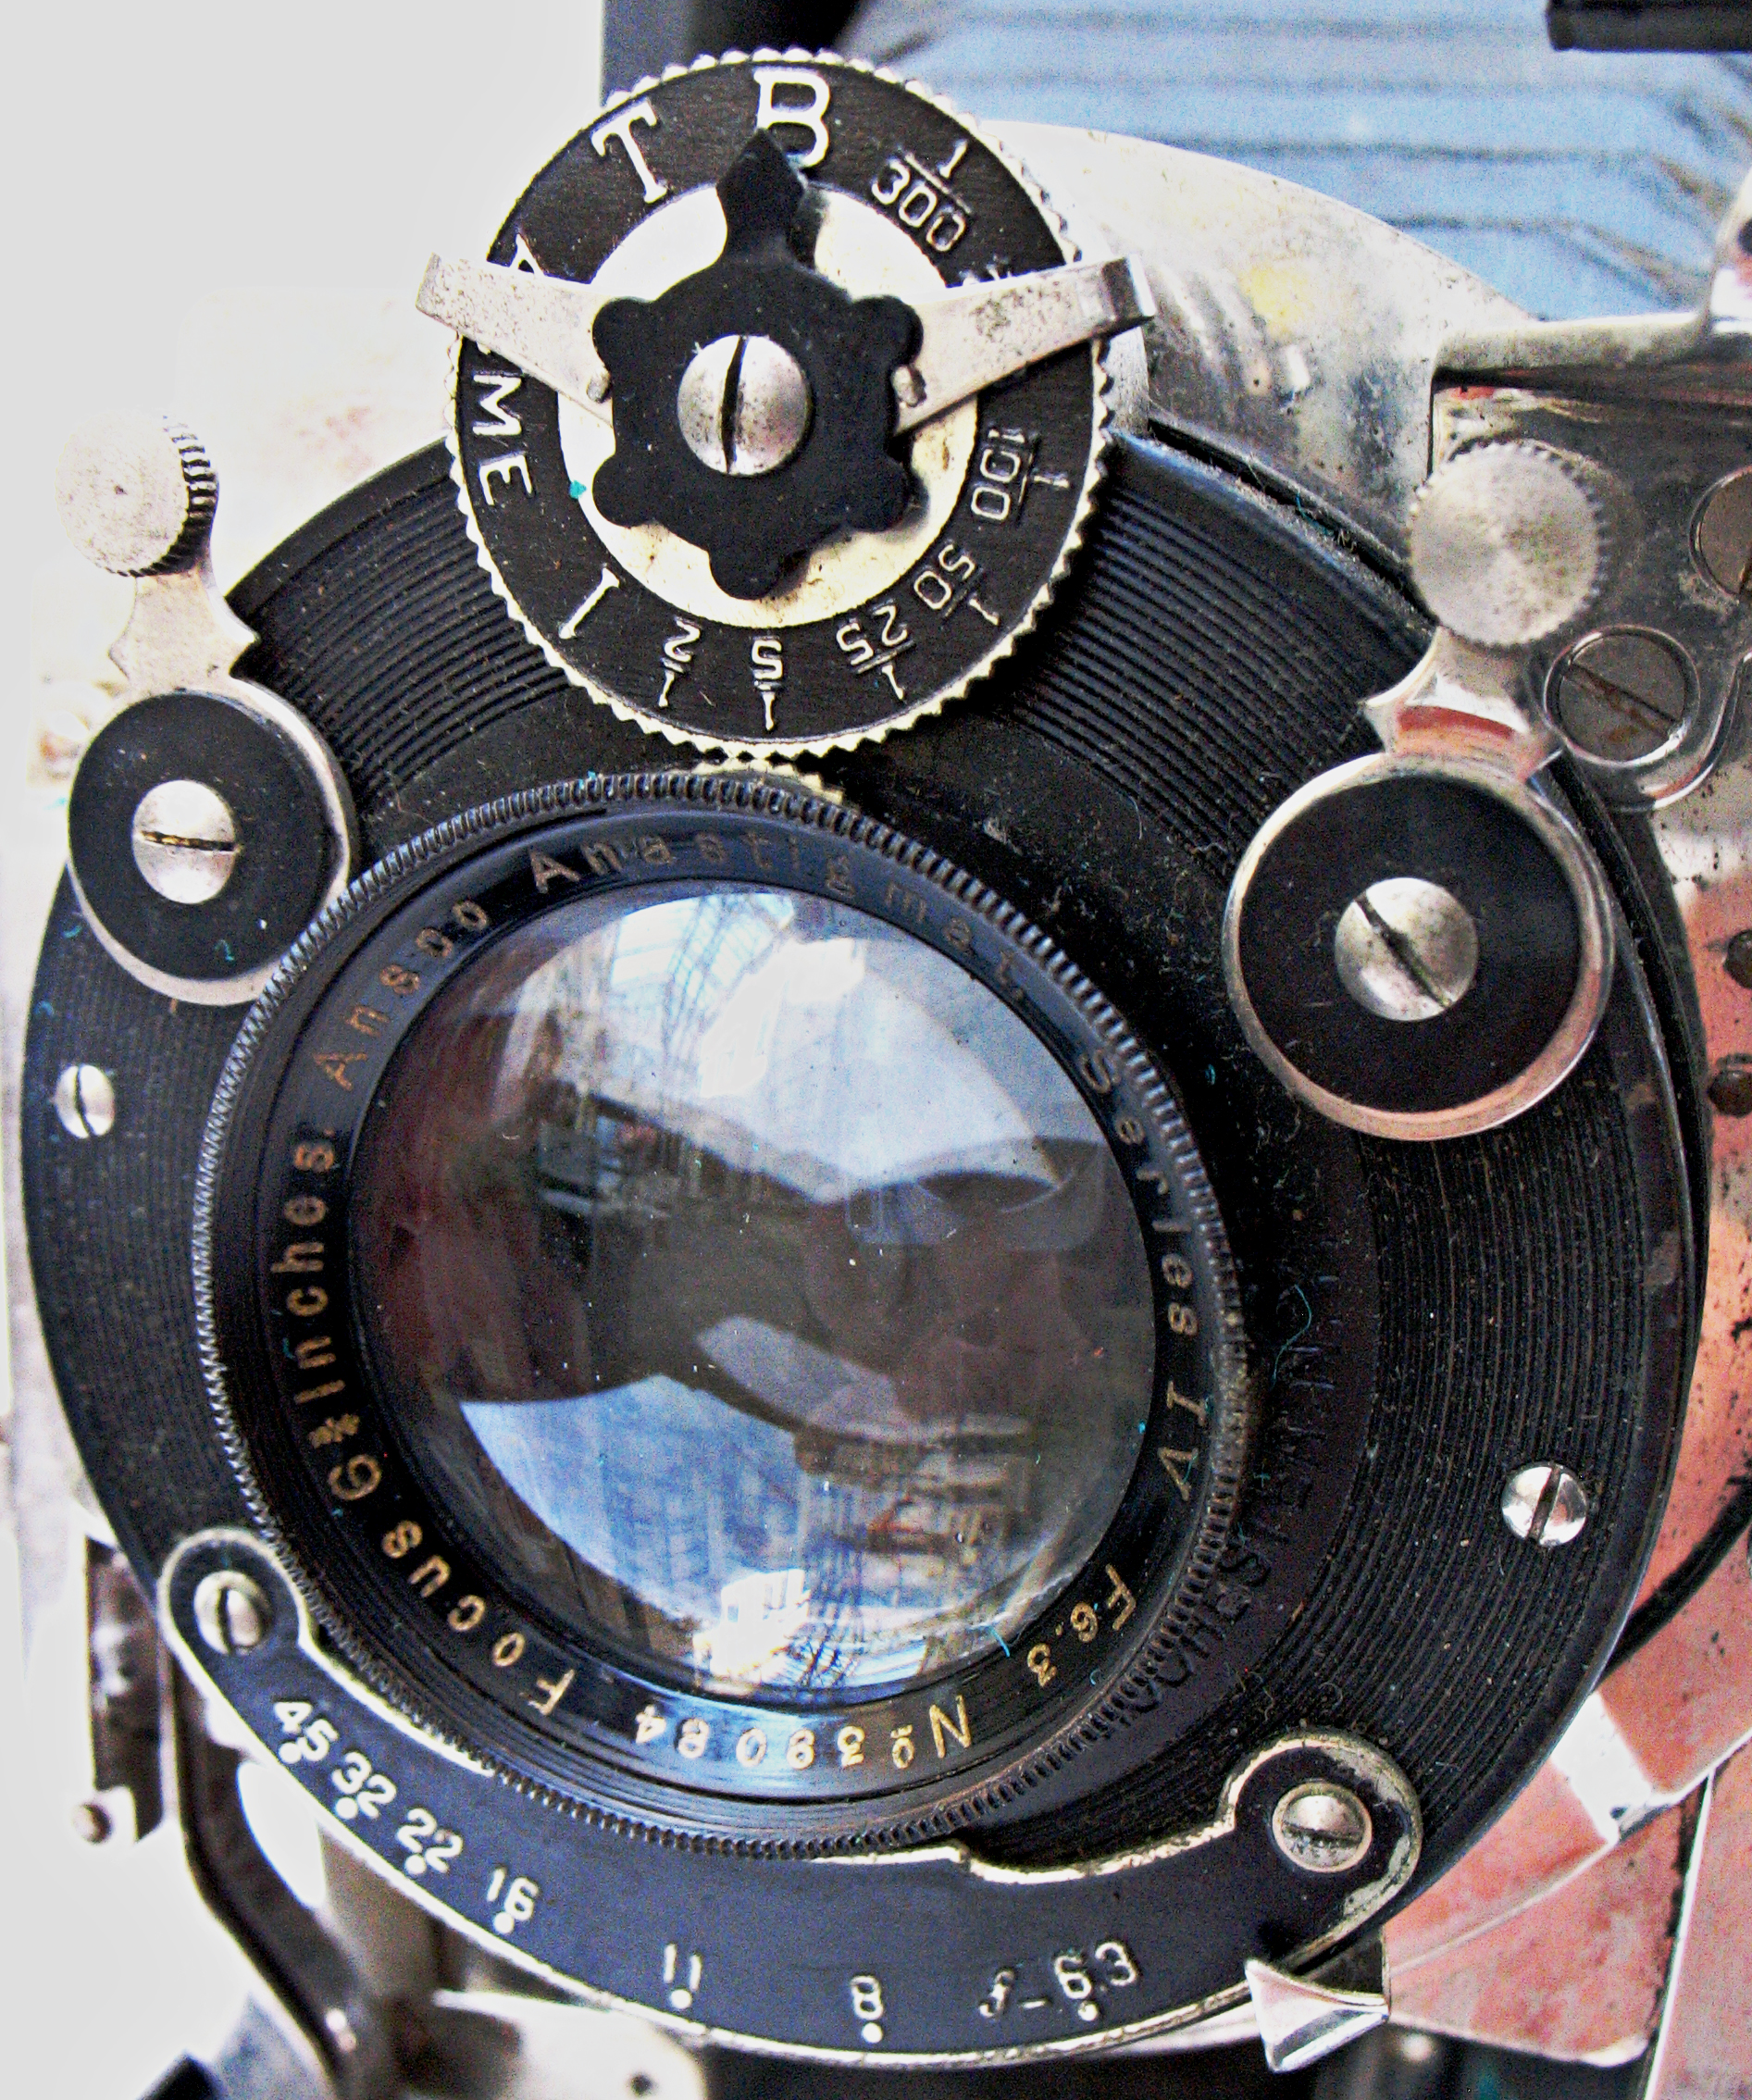
Ansco Anastigmat in Acme Shutter

Ansco Anastigmat of 6 3/4 inch focal length. The f-stop scale employs the modern system rather than numerical progression of the U.S. System, suggesting that this might be a later model. The shutter is a dial-set Acme with speeds from 1 to 1/300 second with T and B. The right lever cocks the shutter, while the left is the release. Overall, as received, the shutter is somewhat slow and hesitant, particularly on the slowest speeds.

Acme shutters were a product of Ilex, producer of the well-known Ilex shutters and lenses. Ilex shutters are a notable product of American mass production, being manufactured entirely of stamped rather than machined metal parts. Although they have been compared by some writers to

Ilex Acme Lenses and Ilex Shutters Catalog

two-dollar alarm clocks, they are for the most part solid and reliable, if somewhat less accurate than the more precisely machined Compurs. One should remember that generations of Americans got up and got to work on time thanks to two-dollar clocks and their homely yet reliable mechanisms. Many thousands of these solid little beasts of burden are still in operation today on a variety of lenses.

The Ilex Acme Shutter

It should also be remembered that the purported accuracy of leaf (non-focal plane) shutters is a matter of some complexity and considerable debate. While the more sophisticated shutters (Copal, Compur, and Prontor) can be within a few per cent of the stated value at slower speeds, performance tends to slip with higher speeds, with older shutters in good condition often being 25-50% slower than the nominal values at higher speeds. Ilex shutters are considered to be accurate to within one stop of exposure.

The Ravages of Age:

Like most of us of a certain age, our lady’s complexion has suffered with the years. The front panel/baseplate is studded with small mounds indicating the position of every rivet and screw. A common feature of leather-covered

Copper Oxide Blisters

vintage cameras, these indicate the position of copper oxide blisters formed by the slow oxidation of copper rivets and screws; this process piles up green copper oxide as the rivets oxidize, and may eventually erode entirely through the leather covering. Lifting the leather, much of which has already come loose, reveals these little mounds of green copper oxide over the head of every rivet.
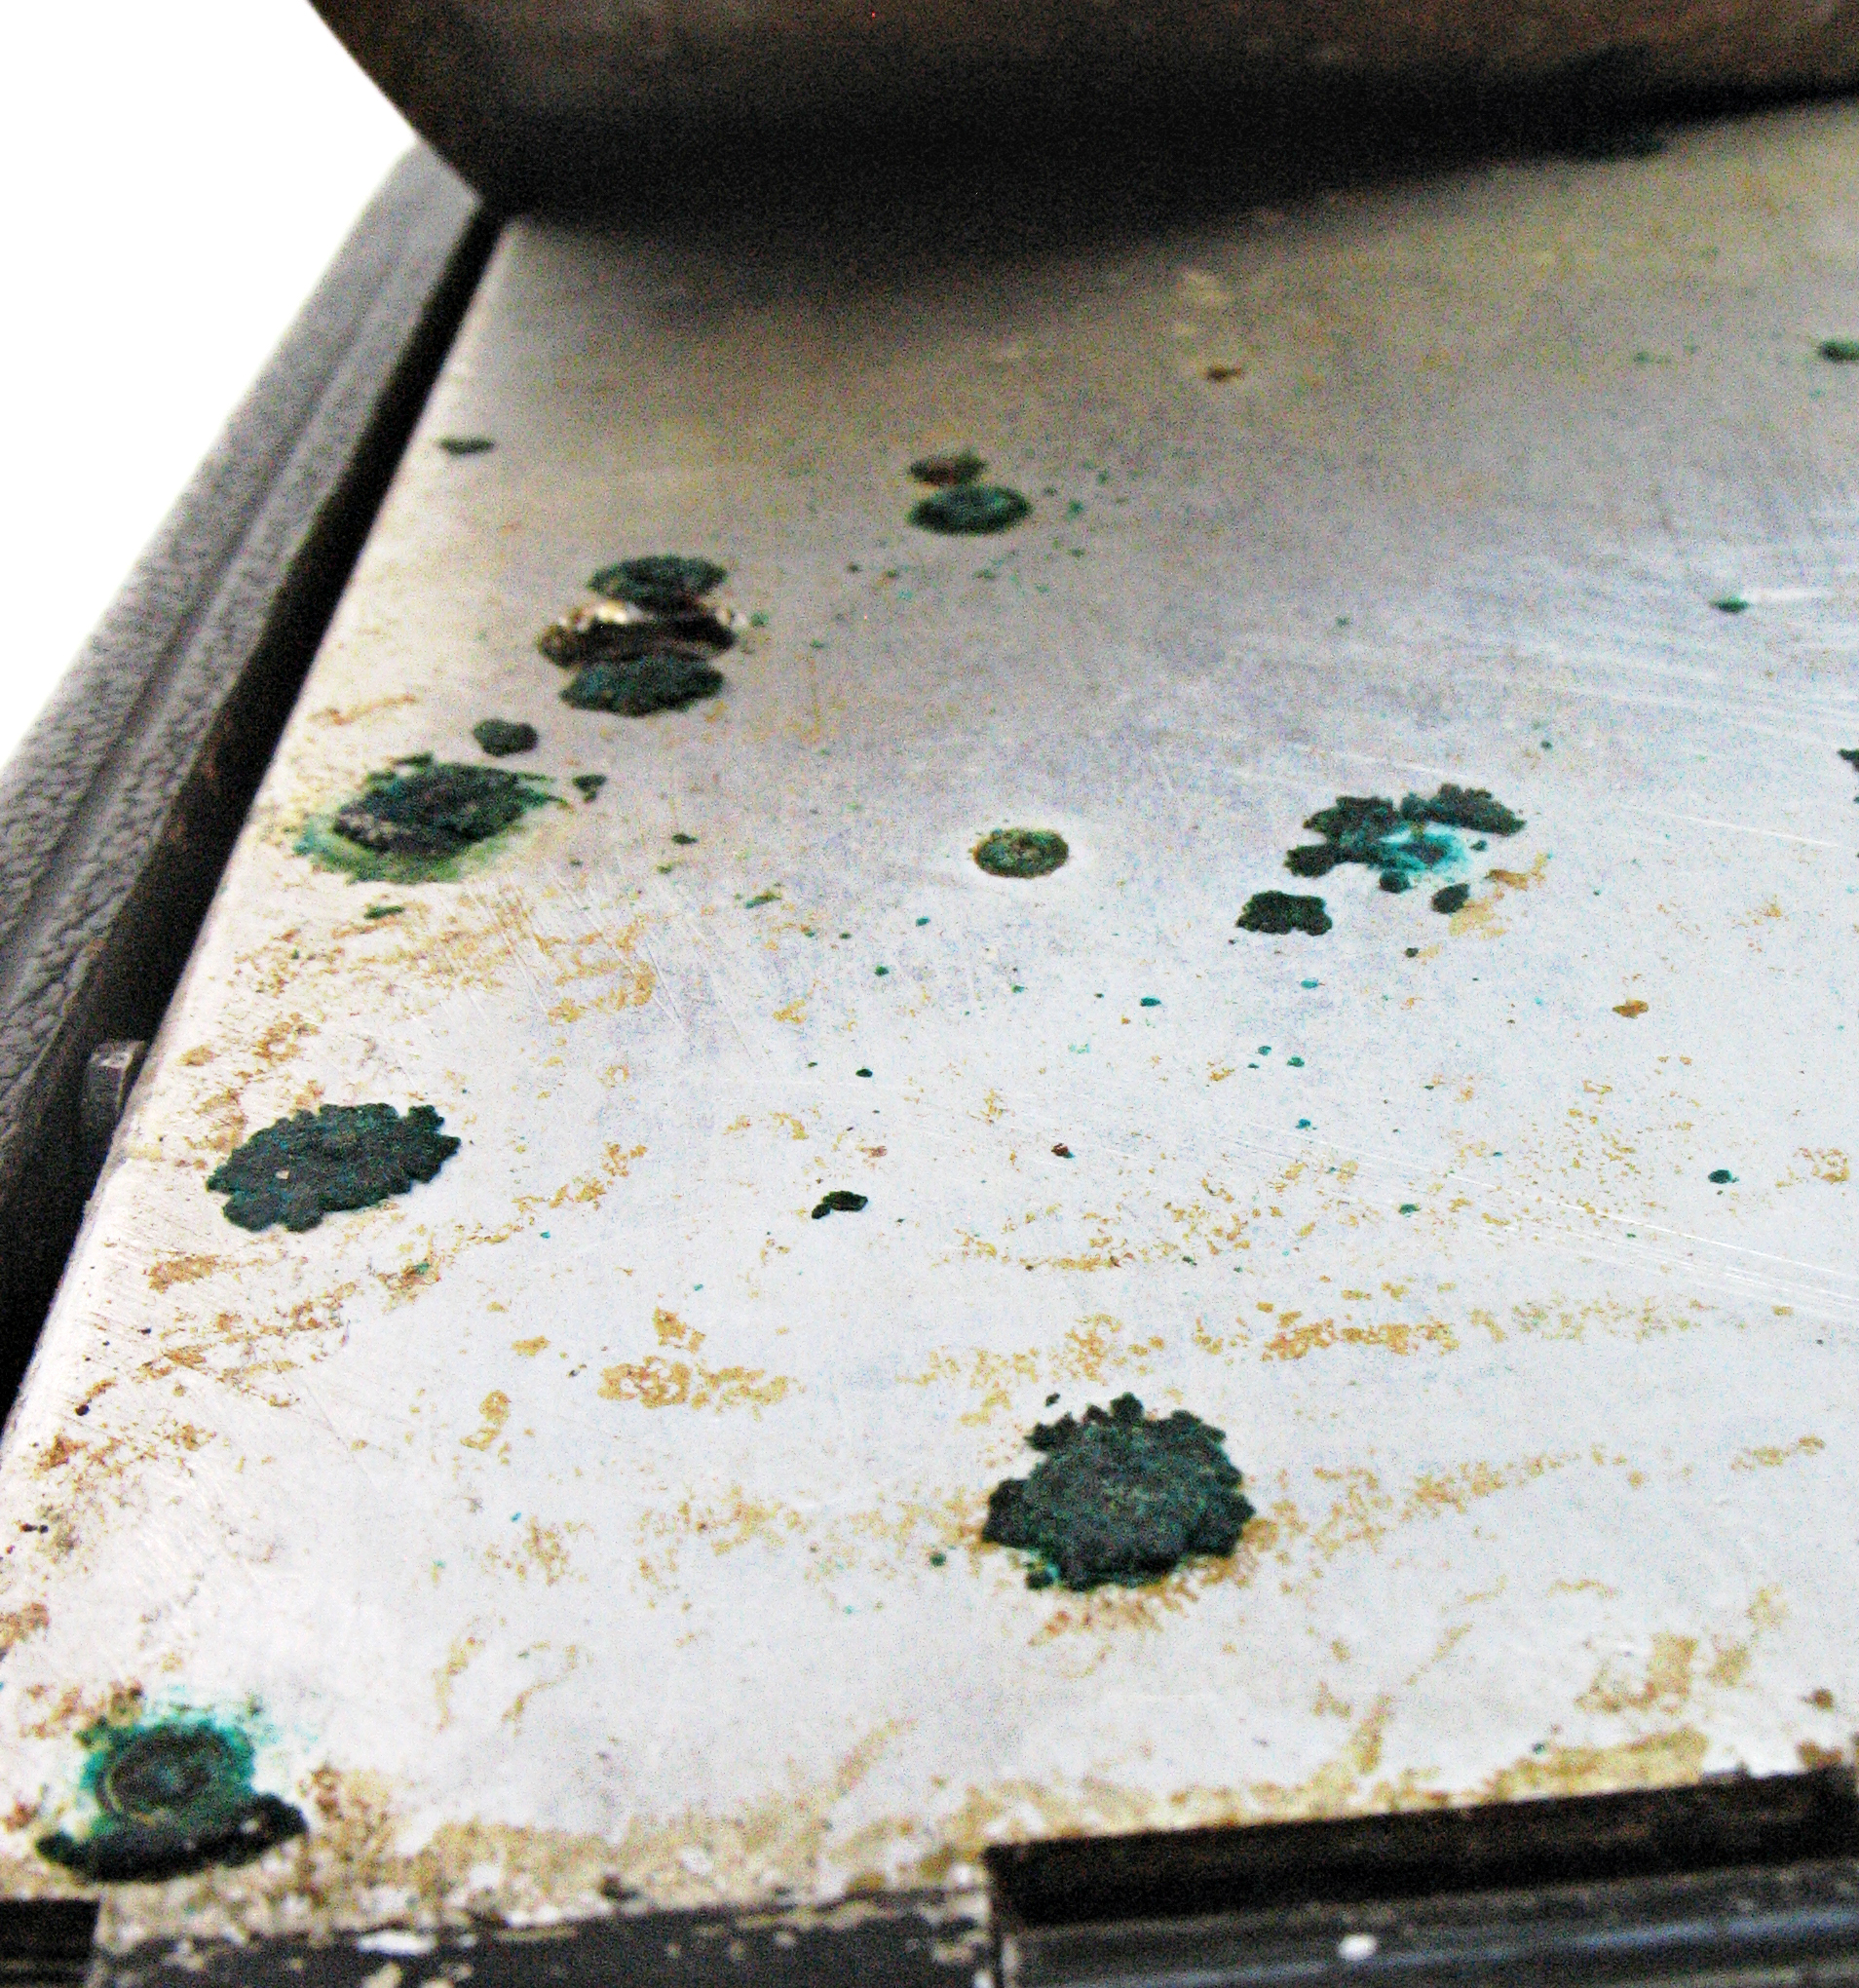
Corroded Rivets

Corrosion is not limited to the rivets; little curls of copper oxide protrude from the base of the focusing rails and patches of corrosion are found on the film winding lever and other brass parts where the plating has worn. Elsewhere, the leather is dry and the glue has failed, leaving parts of the covering hanging.

It should be noted, however, that the Ansco has two characteristics that make it ideal for restoration. First, it it is a truly ratty-looking camera. The leather is dirty and becoming detached , the metal parts are tarnished, the front standard needs polish, and the insides are grimy. Consequently, it was obtained for a modest price. However, the experienced eye will notice that the leather is entirely intact with no tears or missing pieces, the bellows are supple with no corner wear or separation, the lens is clear and without fungus or edge separation, and the camera is structurally completely intact. The Ansco is therefore an excellent candidate for a restoration which, with the exception of a shutter cleaning, should be entirely cosmetic.

The Story:

Every camera has a story, so what do we know about the Ansco? There are some clues. Recent decades are murky, as it was purchased from a used camera dealer on eBay who responded “… I know nothing of its history. I make a market in old photo gear, and this is a cast-off from a friend of mine who buys and collects cameras and typically passes them on to me when he no longer wants them. He had dreams of restoring this one but never got started.”

The Label

One clue to its past is found in an old label glued inside the back plate, showing the owner to be Robert Perrine of Wauwatosa, Wisconsin. It has been 80 or 90 years since this camera was manufactured; one wonders when in this period did he own and use this camera? Given that the advantages of the “postcard” format had largely been eliminated by the mid-1930s by improved films and the ready availability of enlargement, one might assume that the Ansco would have likely been retired from active service after the1930s, and that its time of active use would have been sometime between 1920 and 1940.

These were historic years- from the Roaring 20s to the Great Depression.

Wauwatosa, Wisconsin

A town of 5,800 in 1920, Wauwatosa grew rapidly in the lush glacial farmland of the Menomonee River Valley, just a short train ride west of

Police Raid a Still

downtown Milwaukee. It was the Roaring Twenties, jazz was king in the big cities, and Prohibition was in full swing. Despite Prohibition’s negative effects on Milwaukee’s breweries (the larger breweries were able to stay open by producing near beer or other products such as soda, cheese, candy bars and even snow plows), the area prospered. By the end of the decade, Wauwatosa’s population had nearly quadrupled to 21,000- then came the Great Depression.

There is little specific information on the Depression’s effect on Wauwatosa, but one can infer the impact from events in the Greater Milwaukee area. The

1930s Milwaukee Homeless Community

Milwaukee area’s economy remained strong until 1932, when the Milwaukee Miracle” ended and two-thirds of the wage earners lost their jobs. Poverty became rampant as families lost their homes and went hungry. As bleak as the thirties were for Milwaukee, its municipal government shone during the Depression. The city started its own work relief programs as well as made creative use of the money it was getting from the federal government. However, despite Milwaukee’s successes, the Depression was a miserable time for most Americans, and many farmers lost their land as their farms were repossessed. Many small farms in Wisconsin were abandoned, and their owners moved to the cities. How many images of these times passed through our camera’s lens?

Next, what can we discover about Robert Perrine? For anything genealogical, I’d usually suggest that you see this page. But there is really only one group of people to consult for this case: The Church of Jesus Christ of the Latter Day Saints, i.e., the Mormons. The church’s genealogical library in Salt Lake City is the world’s premier repository of family history data. Consulting their web site at FamilySearch.org reveals over the time period 1900 – 1970 in Wisconsin only one Robert O. Perrine, who was born Sept 15, 1906 and passed away Nov 27, 1992 in the town of Brown Deer. Like Wauwatosa, Brown Deer is a suburb of Milwaukee, suggesting that Mr. Perrine spent most of his life in the Milwaukee area.

However, the mystery deepens. A kind reader, Dean Sturgis, notes that the zip code system was not instituted until 1963, indicating that the label must have been pasted into the Ansco after that time. It is unclear when Ansco stopped making film, but Kodak 122 film, first manufactured in 1903, was taken out of production in April of 1971, so it would have been impractical to use the Ansco after the mid-70s, when film stocks would have run out and labs would have stopped processing larger film sizes.

Kind research by the volunteers at the Wauwatosa Historical Society showed no evidence of a Robert Perrine in the Wauwatosa City Directory for 1932, but by 1936, electrical engineer Robert O. Perrine appeared at 1743 North 73rd Street, together with his wife, Edna Perrine. By 1939, Robert and Edna had moved to 2571 North 81st Street. In 1964, Robert and Edna were still on 81st Street, but Robert had taken a position with the Milwaukee Division of Cutler-Hammer, where he had advanced to the position of department manager. By 1972, Robert had retired, and the couple had been living on 81st Street for over 30 years.

By 1983, Robert and Edna had sold their home and moved to Apartment 318 at 9999 West North Avenue, where they were still living in 1989. As noted above, Robert passed away in November of 1992.

In 1978, Cutler-Hammer was purchased by Eaton Corporation for over $400 million. The company for which Robert worked, now the Milwaukee division of Eaton Cutler-Hammer, is still present on 30th Street in Milwaukee. Unfortunately, inquiries for employee records for Cutler-Hammer from Eaton proved fruitless, and the trail went cold. Still, once again an historic camera took us on a fascinating journey!

Special thanks to Julie Peay, Chair, Research Library and Collections, Wauwatosa Historical Society, and her team of volunteers for their research on the life of Robert O. Perrine.

To be continued…

References:

Bilotta, Scott. “Using Vintage Ansco Roll Film Cameras.” Scott’s Photographica Collection. http://www.vintagephoto.tv/anscofilmtable.shtml.

Church of Jesus Christ of the Latter Day Saints. “Family Search: Robert Perrine.” http://www.familysearch.org/eng/Search/frameset_search.asp

Eaton Corporation Web Site. “Eaton History.” http://www.eaton.com/EatonCom/OurCompany/AboutUs/EatonHistory/.

Grimes, S.K. “Ilex Acme and Universal Shutters.” http://www.skgrimes.com/ilex/index.htm

Kuykendall, Ron. “Ansco Film Numbers and Sizes.” Photographica Digest, Vol XVI, No. 11, Nov. 2009.

Magnum, Walker. “History of odak Roll Film Numbers.” http://www.nwmangum.com/Kodak/FilmHist.html.

“Milwaukee Timeline.” Milwaukee County Historical Society. http://www.milwaukeehistory.net/milwaukee_timeline/1900s.html#Prohibition.

Online Discussion. “LF Shutter Accuracy?” http://www.greenspun.com/bboard/q-and-a-fetch-msg.tcl?msg_id=0065jD

Tomosoy, Tomas. “Restoring Classic and Collectible Cameras.” Amherst Media, Inc.

“Wuawatosa, Wisonsin.” Wikipedia Article. http://en.wikipedia.org/wiki/Wauwatosa,_Wisconsin.

Wauwatosa Historical Society Web Site. http://www.wauwatosahistoricalsociety.org/newresearch_library.htm.

“Zip Codes.” Wikipedia Aricle. http://en.wikipedia.org/wiki/ZIP_code.

On Running After One’s Hat

I must admit it: I stole this title from G. K. Chesterton.  Back when people read (and wrote) essays for pleasure, G.K. penned several famous pages on looking on the bright side of life’s vicissitudes.  Most particularly, he came up with the famous and frequently-quoted aphorism “An adventure is only an inconvenience rightly considered.”  However, what was true for G.K. Chesterton about losing his headgear is just as true for photographers – if you stop planning, keep your shutter cocked, and just let things happen, opportunities for true creativity may fall into your lap when you least expect them.

Attending a course last week near Baltimore, I snatched a few hours to drive out into the rolling eastern Pennsylvania Dutch country near York and Lancaster.  I planned for this cherished side trip, packing my 1914 No.1 Kodak and my entire Baby Graphic kit, along with multiple rolls of film.  As my little rented Nissan purred along roads that crested hills of newly-plowed fields and meandered through valleys filled with cherry blossoms and the

The Silo's Shadow, York, Pennsylvania

verdant foliage of early spring, wonderful old barns and quaint farmhouses seemed to appear around every corner.  I had time to taken several rolls with the Kodak, with which I have learned to work quickly. However, I had little time to set up the Graphic and go though the routine of choosing lenses, getting out the dark cloth, composing on the ground glass, and changing out the film holders.  With the exception of a few frames, it sat in the trunk, and I began to wonder why I had packed it.

Returning homeward that evening, I boarded my little commuter jet to Chicago, only to sit on the tarmac for a cramped and frustrating hour while thunderstorms pounded O’Hare, hopelessly snarling air traffic.  Arriving in Chicago, I discovered that my flight to Seattle had departed, and I, like hundreds of other travelers, was stranded in Chicago until the following evening.  After I had untangled my airline reservations, I headed for baggage claim, only to discover that my luggage was safely locked away from prying eyes and greedy fingers – including my own!  My survival kit for the night consisted of my Baby Graphic, my computer bag, and two novels.  Fortunately, I had thought to pack with me my cell phone charger, my razor, and the essential medicines that keep my aging frame in some kind of balance.

After a night’s sleep and an indifferent dinner at the hotel on the $59 Distressed Traveler Special, I headed back to the airport to check in early, musing as I gazed out the window of the shuttle bus on the general drabness of the Chicago suburban landscape.  It was at that point that I realized that my tripod and Kodak were in my luggage, and that I was stuck with a camera with ground glass focusing and no tripod.  Abandoning my hopes of getting more pictures, I decided to at least get a walk around Chicago’s downtown Loop, and was soon rattling along on the train past miles of old brick buildings and warehouses.  Arriving at the underground station, rusty steel pillars and water stained concrete on the tunnel walls brought back memories of interminable Chicago winters during medical school, and of our longing for the mountains and oceans our West Coast home.

As I walked up Michigan Avenue and over the Chicago River, my spirits lifted somewhat in the sunshine, and I rounded a corner to find the center of Michigan Avenue a riot of color, as huge concrete planters of multicolored tulips marched up the street toward Water Tower Place.  Not only multicolored – there were large tulips, small tulips, single tulips, double tulips, tulips with three stems – and I didn’t have a tripod!

Tulips, Water Tower Place

I decided to at least try bracing myself on the concrete planter lip for a couple of frames, but I did not have much hope of taking home much that was usable.  Focusing on the ground glass, I checked my Kalart rangefinder and found that it was right on – all my careful restoration work calibrating the infinity stops was paying off, at least.

It was then that two things happened, and I began to clamber out of my mental rut of planning photography.  First, I remembered that the Baby Graphic is a press camera, and that it was designed to be used hand-held, with a body-mounted shutter release, and a wire frame viewfinder adjustable for parallax.  Then, I really began to look at my tulips, noting how the flower heads bobbed and swayed in the draft as taxis and buses tore by, and my left brain began to translate that into artistic swirls and blurs on the film.

Soon I was bracing my leg on the rim of the planter, and hardly letting myself breathe as I shot frames of the sunlit flowers at slower and slower shutter speeds to show the motion of the swaying flowers. Soon I was making multiple exposures, stacking translucent images of dancing flowers one upon the next.

After several rolls of film, I caught a cab to the north side, wandering through working-class neighborhoods with old brownstones and auto repair shops housed in cavernous old brick buildings as I soaked up the feel of the city.  When it was time to leave, I found myself once more clattering south toward the Loop.  Arriving at the Lake Street Station, the car door opened to admit the sound of a spirited R&B number from a tall, skinny busker in a leather vest and cap.  A five dollar bill in his guitar case brought forth a quick smile, and I unpacked my camera.  As trains rumbled in and out, disgorging their passengers, I was struck by the manner in which most of the travelers bustled along the platform, intent on their destinations and completely oblivious to the energy of his music.  Suddenly, I was glad for my camera and the way it had forced me to stop and take notice.  I shot several frames, and then had to hurriedly close the Graphic and run for my train to the airport.

A week later, I picked up my film at the post office, and hurried home to view the scanned images.  Of the scenes of the busker, my favorite captured the tension  between the music and a preoccupied commuter striding along the platform against the blurred image of the moving train.

The Busker and the Commuter

My Chicago transit pass is pinned up in my office as a memento of a perfect day.  I can’t wait till I miss my next flight.

Reference:

Chesterton, G.K. On Running After One’s Hat and Other Whimsies.  R. McBride and Company, 1933.

Note: This story appeared in the Fall 2010 issue of Canadian Camera magazine

Gerbera Daisies

Gerbera Daisies

This image, which is digital, shows once again the value of accompanying vintage film photography with digital capability.  On a visit to a local nursery, I was occupied by shopping, but had time to snap this image with my Canon A610 point-and-shoot camera, which has some manual control in addition to the usual automatic modes.  The small CCD chip allows greater depth of field than is possible with film.  I would not have had time to compose the image with my vintage cameras, and would not have been able to achieve this depth of field in a hand-held shot.

Restoring Vintage Cameras III: Techniques

This posting will cover some of the basic techniques that I use in camera restoration:  leather restoration, bellows repair, and maintenance of camera interiors.  There may, of course, be a few digressions…

Leather Restoration:

The three most common camera coverings are leather of the “Morocco” variety, typically found on the older, pre-1925 roll film cameras and large format cameras; harder black leather encountered on post-1925 roll film cameras; and leatherette and other artificial coverings found on prewar to modern cameras.

It is worth noting that true Moroccan leather is made from goatskin; the French make an imitation from sheepskin, which is also known as saffianThe Household Cyclopedia of General Knowledge‘s account from 1881 of the preparation of Moroccan leather makes interesting reading but is not for the weak of stomach.  The descriptions of boiling the skins in lye or the days soaking in the nearby river provide an intriguing historical perspective, but the accounts of extended sojourns in extracts of dog feces are unappealing.   It is to be hoped that George Eastman chose his suppliers with some attention to their methodology.

Etherington and Roberts’ publication on bookbinding defines Moroccoan leather thus:

“…A vegetable tanned leather having a characteristic pinhead grain pattern developed either naturally or by means of graining or boarding, but never by embossing…

…by long usage, the term “morocco” is taken to denote a goatskin, tanned by any vegetable tannage, and boarded in the wet condition…

…when properly produced, morocco goatskins are very durable, flexible, beautifully grained, and relatively strong… The skins are…. obtained from several areas, including: wild goats, principally from Africa, which generally produce heavy skins with a very bold grain; domestic goats, which produce a leather with the more familiar hard grain or ‘pinhead morocco’; and true Persian Morocco, which is produced from Indian or East Indian goatskins…”

As an aside, it should also be noted that, besides producing camera leather, the goats of Morocco are also famous for their ability to climb Argan trees,

Moroccan Goat Tree

whose fruit forms part of their diet in this extremely inhospitable environment.  It appears to be a successful symbiotic relationship, as the droppings of the goats nourish the trees.

And returning to the topic…

Leather in good condition on later vintage cameras tends to be fairly hard and durable; if not mistreated, it may need nothing more than a light coating of a good leather cream followed by shoe polish and a good buffing.  Also useful for restoring the sheen to black camera leather is the water-based instant shoe polish found with a sponge beneath the cap.  Once applied, this is quite durable and imparts a high gloss to the surface.

The older Moroccan leathers were softer and more susceptible to staining and deterioration if misused.  If well cared for, they may still be in wonderful shape, with good durability and flexibility.  However, Morocco leather can become extremely friable with age if it dries out.  Leather that has become detached should ideally be reglued with one of Aileen’s tacky craft glues before being subjected to polishing and rubbing.

Gently replacing the essential oils is the first step to restoring the integrity and flexibility old dry leather; this can be accomplished with either an oil-based treatment such as Dyo Viscol Waterproofing, or a good leather cream such as Dyo Leather Balm, and optimally, both used in succession with the oil-based treatment following the water/silicone-based cream.  After the leather has been rehydrated, the surface can be restored with a good quality shoe cream or polish and then buffed.  Scuffed areas, which appear lighter,  can be darkened by local application of either leather dye or a dark brown shoe cream.

Other techniques are available but need to be tailored to the condition and type of leather.  A product known as Lexol is also used as a leather conditioner, penetrating well and rehydrating the leather in one step; however, it darkens the leather and lends it a slightly oily texture.  I use it only when I am desperate.  Gently scrubbing the leather with a mild detergent can be used as a first step on more modern, harder camera leathers but should be attempted only very carefully (if at all) with older, softer Moroccan leathers.

Replacement black leather for mid-twentieth century cameras can be purchased from cameraleather.com.  Although buying Moroccan leather on eBay has been suggested, obtaining an exact match to leathers from the earliest part of the twentieth century may be difficult, and scavenging the covering from an unrestoreable early Kodak may be the best way of replacing missing pieces.

Bellows Repair:

Bellows restoration is another example of my Golden Rule:  The best way to restore a bellows is to buy the best bellows you can find and to have to do as little as possible to it.  It is possible to disassemble and rebuild a bellows, and instructions exist for doing so; however, it is a complex project best left to those with experience.  Some flaking and peeling of the outer bellows covering can be handled by injecting dilute white tacky craft glue under the detached leaflets and re-securing them when the glue has partially dried.  If this problem is extensive, however, this is a painstaking effort and may not be worth it.  Seriously deteriorated bellows are best left to professionals unless you have the time or inclination to take on a challenging project.

Bellows that are without major structural defects still exhibit a variety of small tears and holes.  Most commonly, these occur at the corners or edges of folds where abrasion or repeated manipulation have created small holes, called “pinholes” in photographic vernacular.  These tiny corner holes represent one of the most annoying problems in vintage camera restoration.  Occurring at the points of maximum wear and maximum mechanical stress, they are difficult to repair with any degree of permanence.  As a gardener, a bellows full of corner pinholes is reminiscent of a lawn infested with moles – see below.

The many methods for fixing pinholes attest to the difficulty in finding a definitive remedy.  They can be taped with black tape, but this method is, in my opinion, ugly and bulky. The traditional method is painting them with a mixture of lamp black and white glue.  Lamp black, also known as “Carbon Black” or “Pigment Black 6”, is an extremely stable black pigment traditionally composed of fine soot collected from incompletely burned carbonaceous materials.  Used as a pigment and in matches, explosives, lubricants, and fertilizers, it is today obtained as a byproduct of coal tar distillation and is available from Naturalpigments.com.  I have had no experience with the combination of lamp black and white glue as a method of repairing bellows.

Other techniques suggested on the Internet do not work.  Black silicone rubber aquarium sealant creates a mess.  The corners stick together and then the whole layer peels off like pizza cheese.  Neither does the black rubber goo with which divers seal their wet suits.

The best solution to bellows pinholes and small tears is a material called Plasti-Dip, recommended by Thomas Tomosoy in his excellent book,  “Restoring Classic and Collectible Cameras.”

Plasti-Dip is a syrupy plastic material used to coat tool handles.  Manufactured by Plasti-Dip International (http://www.plastidip.com/home_solutions/Plasti_Dip), it can be painted in a thin coating onto bellows, covering up small holes and tears.  It is lightproof, flexible, and tough.  Some years ago, I bought a No.1 Kodak Junior only to find that  some kind soul had carefully peeled off the entire outer paper coating, leaving only exposed struts and the bellows’ inner lining, which, fortunately, was intact.   Several thin coats of Plasti-Dip produced a smooth outer coat that was almost indistinguishable from the original surface.  I am still using the camera, and the surface has withstood multiple openings and closings.  I heartily recommend Plasti-Dip for bellows repair.

Camera Interiors:

Nicks in the paint on the interiors of metal-bodied cameras are best touched up by hand with a fine brush.  If the bellows interior is faded and has lost its rich black color, a matte black spray paint such as Krylon can be used after carefully shielding the camera body.

The interiors of wooden camera seem to have been treated with a semi-transparent black stain that has soaked into the wood but has not formed a surface coating.  After some experimentation, I have found that India Ink brushed onto the surface reproduced this coating well and is almost indistinguishable from the original stain.  Once it has been painted on and has soaked into the wood, it is quite durable and can readily be touched up as needed.

References:

“Lamp Black.”  http://naturalpigments.com/detail.asp?PRODUCT_ID=480-50S.

“Moroccan Leather.”  1881. The Household Cyclopedia of General Information.  http://www.publicbookshelf.com/public_html/The_Household_Cyclopedia_of_General_Information/moroccole_cfh.html.

Roberts, M. T. and Etherington, D.  “Morocco.”  Bookbinding and the Consevation of Books:  A Dictionary of Terminology. U.S. Government Printing Office (Electronic Edition).  http://cool.conservation-us.org/don/dt/dt2275.html.

Tomosoy, Thomas.  “Restoring Classic and Collectible Cameras.”  Amherst Media Inc., Buffalo, New York. 1998.

Wikipedia entry on Morocco Leather.  http://en.wikipedia.org/wiki/Morocco_leather.

~~~~~~~~~~~~~~~~~~~~~~~~~~~~~~~~~~~~~~~~

Pinholes Are Like Moles:

Regarding bellows and their problems: consider moles.  Hosting one of these obnoxious little creatures is a bit like opening your home to your alcoholic Uncle Ambrose and his five pot-smoking teenagers.  They will cheerfully

The Common Garden Mole

install subterranean turnpikes and interchanges beneath your lawn, causing the surface to collapse into ruts and miniature sinkholes.  Their air shafts are marked by those familiar mounds of earth that pockmark your front yard like miniature heaps of mine tailings.

True story, Seattle Times, circa 1995:  An amiable Seattleite had an evil neighbor.  This individual argued about fences, cut limbs off the good neighbor’s favorite trees, complained about the slightest noise, and generally made his neighbor’s life miserable

One day, the evil neighbor put in a new lawn, and stood admiring it from his front porch.

Now, every once in a while, the cosmos does decide to balance its books.  A few days later, a mole moved into the good neighbor’s yard, and soon little dirt piles began to appear.  Being a kindly soul, the good neighbor bought a live trap and succeeded in capturing the mole.  Unfortunately, this event happened right after a particularly egregious episode between the two neighbors.  Proving that, when no-one is looking, even the best of us are capable of acts of true depravity, the good Seattleite crept into his neighbor’s yard after dark and let the little critter go.

Within a week, the mole had totally destroyed the evil neighbor’s yard.

Which is why anarchy doesn’t work.  People are not naturally good.  At least not all the time.

The truly amazing thing about moles is the number of ways that have been proposed for getting rid of them.  The traditional method is the mole trap.  Placed into a hole dug into the burrow, its jaws snick shut as the unsuspecting creature brushes past, neatly send him to the place where the worms are large and always slow.  One company sells castor oil by the gallon to spray on your garden.  Or you can feed a pipe connected to your mower’s exhaust down the hole, doing the little monster in with carbon monoxide.  One gardener piped acetylene gas down the holes, then dropped in a match.  Another drove steel stakes into his lawn then connected them to high voltage.  I have a friend who pours gasoline into the holes, then sets them on fire.  I tried it.  Doesn’t do much for the moles, but it’s a lot of fun.

After spending a bundle on wimpy mole bombs, I found a solution: road flares.  You just take off the cap, hit the phosphorous-laden red end with the striker, and shove the flare down the hole.  Presto!  The burrow fills with evil-smelling sulfurous smoke.  Doesn’t kill the moles, but the smell usually persuades them to go to the Sheraton for a few weeks.

Truth is, the reason there are so many ways to get rid of moles is that none of them work.  At least not permanently.

Pinholes are the moles of photography.  They are difficult to fix, recur frequently, and ruin your best pictures when you least expect it.  Thank God for Plasti-Dip!